Laxius Soul Forever Heroes Maiden Maiden Odessa When the Light Dies

Three The Hard Way

Three The Hard Way

Postby loof123 » Wed Aug 11, 2010 6:39 pm

This is an awesome game made with RPG2K which uses unique systems.


"Enter the shoes of an unlikely hero, who dreams of nothing more than riches and saving the world? Well let's just say thats not at the top of his agenda. See it for yourself in Three The Hard Way"


GENERAL STORYLINE :


Many years ago, a mysterious group of monsters called "Kaibutsu" appeared in Durham Kingdom and ravaged the land. No one was able to resist their power, that is, until a hero named Carolus emerged. He was able to defeat the Kaibutsu leader, who happened to be his sister, and save the nation. After this, the people made him their king. However, 65 years have passed since his victory, and gradually, as he has aged, he has surrendered more of his political power to his vassal dukes, who have very different ideas on how the kingdom should be run.

All of this is trivial background noise for a certain bartender from a backwoods forest town. Vance, the bartender in question, is bored with life, and decides he needs some excitement and some big money. The less actual hard work involved, the better. And nothing will stand in his way ...


FEATURES :


- Day/Night System: Some NPC's, shops, etc will be accessible only during night/day.

- Choice and consequence: Each and every decision alters the storyline no matter how minor. Some missions can be finished in a variety of ways, and the choices you make will have lasting repercussions.

- Mini-Games: This game is truly mini games galore. You name it, this game has 'em all. Switch fun, boating, racing, etc. Hell, I don't even remember half of them. This game just has so many.

- Non-linear gameplay: Second half of the game is totally non-linear as in you don't need to follow a single pattern. Allows players greater freedom by presenting them with challenges that can be completed in a number of different sequences. For example, a three-way branching storyline. How you get to the end is determined on your own.

- Battle System: The game does not use the system of battling monsters to level up and do this a million times till you get to your desired level. The battle system isn't the usual "level up" type, instead it increases your stats randomly after fights. So if you attacked a lot, and then in the end your attack stat would increase or maybe you dodged quite a bit, and then your agility would improve. However, once an area is deemed too easy for you (by the game), you will not gain any stats, unlike "level up" games where (if you wished) you could waste days on end beating up easy monsters and still level up eventually.

- Alchemy system: The way this system works is the player will come across various items and can combine them to learn new spells for one of your characters. These spells can be both formidable and powerful.

- Skill/Technique system: Alchemy isn't the only way to obtain new skills though, sometimes you'll find secret scrolls in various 'hidden' locations on the world map that will allow you to teach your characters special techniques. Aside from that, characters can also learn permanant skills by battling and 'temporary skills' by having a certain weapon/item equipped. This makes each character's skill lineup very custom.

- Dozens of sub-plots and side quests: Each sidequest is not only unique and enjoyable, but also are a key aspect to uncovering more of the storyline!

- Item shop system: Items are sold to you based on the raw materials you deliver to them (through collecting different enemy parts) which will then be combined to create different things.

- Menu Prism: From the Menu Prism you can access a custom party selecter, various stats (time, battle stats, etc.) and you can even change the difficulty of the game.


CHARACTERS :


There are a plethora of characters in Three the Hard Way, and the user may not always control the main protagonist, Vance. For example, near Tatum's hideout, the user must control Kanna the Alchemist, in order to progress in the game.


MAJOR CHARACTERS :


Vance - the protagonist in the game who seeks to continue on his missions not for altruistic causes but rather for money and to escape his "boring" hometown of Somerset.

North - North is Vance's best friend and companion is TTHW. He is probably the closet to the traditional Role Playing Game hero since he wants to save the kingdom and is not motivated by greed as is Vance. As the plot progresses, the user learns that North will have more reasons to fight Duke Greene and the Kabitsu lords.

Clifton - Clifton is another bounty hunter (the original profession of Vance) who occasionally joins Vance and North in their quests. The first time Vance meets Clifton, Clifton uses the Konsui strike method to give Vance a coma (from which he later recovers).

Fayette - Duchess Fayette is the daughter of Duke Salem, and first meets Vance and North at the inn in Burlington. She accompanies North and Vance from that point onwards, trying to save the kingdom from Duke Greene. Duchess Fayette and Vance always bicker with each other.

Anderson - Vance meets Anderson at the dessert near the oasis of Pittsboro, when Anderson lends Vance a hand to climb up from the side of a cliff. Anderson is a hard fighter who aids the group in fighting Duke Greene. His past is a mystery and in time, the user learns that he may have a lot more realation to the turmoil than he lets on.

Kanna - Kanna is an alchemist who revives Dutchess Fayette after she is rescued by Vance (from Benson and Maudlin - two bounty hunters). She is the reason that North and Vance set out on the quest to find Fayette and later hunt down Duke Greene, as she kills Greene's army during a battle between Greene and Salem (although spares North and Vance, who were caught in the battle).

Holly - Holly is the niece of Clifton, (regularly calling him "Uncle Cliffy" ) and acompanies the group in hunting down Greene (agaisnt the wishes of Uncle Cliffy). She is a thief by trade, and is first introduced when she escapes from pirates with North.

Roper - Roper is a top ranking official in Duke Greene's army and switches over to Vance's group when her sister is murdred and her town is destroyed. She only joins the group to hunt down Greene and moves to the city of Bragg after that mission is complete. NOTE: Roper only joins if the player selects to travel to Dillion on the boat.


MINOR CHARACTERS :


Benson and Maudlin - Two bounty hunters hired by Duke Greene, who are thorns in the road to Vance and his party.

Raynham and McDonald - The first travelers who accompany Vance. They explain the political turmoil and problems to the otherwise naive Vance.

Baron Rockwell - A power hungry baron who steals the King's Olar Amulet and tries to kill Dutchess Fayette. NOTE: Only appears on a sidequest.

Whitaker and Gastonia - Two guards in Duke Winston's army who'll accompany you on a few quests early on.

Tatum - The "Bandit Queen" who aids Kanna when she tries to go up to Fairfax lighthouse, in order to revive Vance.

Captain Dunn - A high-ranking official in Duke Greene's army, who is the last supporter of Duke Greene (if Roper is in Vance's group).


DUKES :


Although Carlous reigns as King, he delegated his powers to three dukes 7 years ago. Their beliefs are the cause of problems in the world. They are:

Duke Salem- The liberal Duke who seeks to move forward amid the problems of his kingdom. He has a feud with Duke Greene.

Duke Winston - Duke Winston is the median between Duke Greene and Salem. He does not seek to move forward or move back in time.

Duke Greene - Duke Greene is the main problem and antagonist in the game. He wants to move back in time, before the Kabitsu War and end the "wantoness" in the world (through his crystal in Fairfax forest and addicting his kingdom to the drug Holunca).


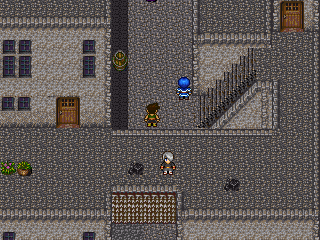
SCREENSHOTS :

Image
Image
Image
Image

Downloads:

Official Site:http://www.queenscourt.org/games.php?GameID=6
RPG Revolution Page: http://www.rpgrevolution.com/game/three-the-hard-way_147.html
Direct download with RPG2K RTP:
http://www.queenscourt.org/games/tthw-fullpack.rar

FAQ's:

Weapon And Equipment FAQ by Cylian: http://www.mediafire.com/?0gnnid5doii
Three The Hard Way FAQ by Velvet Dew: http://www.mediafire.com/?nyqkmmmlcyo
Last edited by loof123 on Fri Aug 13, 2010 8:31 pm, edited 1 time in total.
User avatar
loof123
PhysicMage of Arkadya
 
Posts: 5803
Joined: Tue Sep 22, 2009 7:55 pm

Re: Three The Hard Way

Postby jyarceus1993 » Wed Aug 11, 2010 6:41 pm

I'll make sure to download the first thing tomorrow +::Zzzz
Spoiler: show
Image

Image
Spoiler: show
Image

La shai'a waqi'on motlaq bal kollon momken-Altair
User avatar
jyarceus1993
DreamLord of Myst
 
Posts: 14471
Joined: Wed Apr 28, 2010 3:03 pm
Location: Chennai,India

Re: Three The Hard Way

Postby loof123 » Wed Aug 11, 2010 6:42 pm

WIP Walkthrough by randomperson and Sage of the Wise: (Most parts are done)

CONTENTS: (To jump to a particular section, Ctrl+F the stuff in square brackets after the section name)

CHARACTER GUIDE [char]
- Vance [charva]
- Clifton [charcl]
- Raynham [charra]
- McDonald [charmd]
- North [charno]
- Fayette [charfa]
- Anderson [charan]
- Kanna [charka]
- Whitaker [charwh]
- Gastonia [charga]
- Holly [charho]
- Tatum [charta]
- Roper [charro]
*The rest isn't done yet*
WALKTHROUGH – ACT ONE [wk1]
- Searching for North [a1p1]
- Bounty Hunters [a1p2]
- Journey to Burlington [a1p3]
- Marion's Island [a1p4]
WALKTHROUGH – ACT TWO [wk2]
- Looking for Duke Winston [a2p1]
- Quest for the Kibou [a2p2]
- Across the Desert [a2p3]
WALKTHROUGH – ACT THREE [wk3]
- The Thought Realm [a3p1]
- Hunting Down Duke Greene [a3p2]
- The Kaibutsu War [a3p3]
- Showdown in Beaufort [a3p4]
SIDEQUESTS [wks]

--------------------------------------------------------------
VANCE [charva]
--------------------------------------------------------------
BASE STATS:
HP: 15
MP: 0
Attack: 6
Defense: 6
Mental: 8
Agility: 12

LEVEL-UP APTITUDES:
HP: 3
MP: 3
Attack: 3
Defense: 3
Mental: 3
Agility: 3

STARTING ITEMS:
Dull Switchblade
Cloth Shirt

SKILLS:

TEMPORARY SKILLS
These will only be available when a specific item is equipped on the character in question.

Bokken Slice – MP 2
Item Needed: Bokken
A quick strike using a bokken. (1 Enemy)

Defense up – MP 2
Item Needed: Hide Armor
Raises defense value. (1 Ally)

Helluva Tough – MP 3
Item Needed: Gold Army Medallion
Scares the enemy and lowers their attack ability. (1 Enemy)

Blockhead – MP 4
Item Needed: Wood Helmet
A headbutt with a fancy name. (1 Enemy)

Frost Cut – MP 5
Item Needed: Short Sword
A powerful sword/ice technique (1 Enemy)

Light Flash – MP 4
Item Needed: Short Rapier
Reflect sun or moonlight from a swordblade. (Blinds All)

Strengthen – MP 1
Item Needed: Protect Ring
Strengthens defense (User)

Electric Slice – MP 5
Item Needed: Rapier
A slice using the power of electricity. (1 Enemy)

Power Healing – MP 3
Item Needed: Plate Armor
The user wills themselves just a little bit healthier. (User)

Drink Water – 1 Badin of Water
Item Needed: Canteen
Cures dehydration. (User)

Frighten – MP 3
Item Needed: Bronze Helmet
Lowers enemy attacking effectiveness. (1 Enemy)

Rapid Imaging – MP 5
Item Needed: Long Sword
Increases agility by creating temporary afterimage (User)

Lucky Break – MP 5
Item Needed: Alex Vest
Loser heroes tend to rely on this. (HP + Agility up – 1 Ally)

Doublestrike – MP 5
Item Needed: Buster Sword
Returns twice as much damage to the enemy.

Force Barrier – MP 3
Item Needed: Light Mail
Raises defense against most physical attacks. (User)

Randy Moss – MP 6
Item Needed: Horned Helmet
It's all or nothing with this spell on an enemy. (Kills Enemy)

Obfuscate – MP 3
Item Needed: Modified Plate Helm
A skill which causes confusion in an enemy. (1 Enemy)

Earth Breaker – MP 18
Item Needed: Broad Sword
Creates a chasm from which rocks fly at the enemy. (All)

Hailstorm – MP 10
Item Needed: Silver Armor
A powerful hailstorm overwhelms all enemies. (All)

Poison Strike – MP 7
Item Needed: Machete
Can poison an enemy. (1 Enemy)

Vacuum Wave – MP 12
Item Needed: Silver Epee
Power decreases as it rips through all enemies. (All)

Muckraker – MP 6
Item Needed: Silver Scimitar
Flings slime, mud and other junk at unlucky enemy (1 Enemy)

Stonewall – MP 6
Item Needed: Silver Shield
Summons stones to form a protective wall. (All Allies)

Transcendant – MP 7
Item Needed: LeviathanTooth
A powerful strike of mystic energy (1 Enemy)

Spincut – MP 8
Item Needed: Kodachi
Self explanatory. (1 Enemy)

Aegis – MP 4
Item Needed: Buckler
Raises defense. (User)

Undercut – MP 4
Item Needed: Dunn's Blade
Causes an opponent to stumble. (1 Enemy)

Nightshade – MP 20
Item Needed: Dyn Ring (at night)
Causes the night itself to strike at all enemies. (All)

Photosynth – MP 20
Item Needed: Dyn Ring (at daytime)
Draws in sunlight to replenish HP. (User)

Suicide Blast - MP
Item Needed: Wakizashi
Sacrifices all HP and MP to destroy all enemies.

Rune Slash – MP 1
Item Needed: Rune Ankh
Uses the power of the rune ankh to slash an enemy. (1 Enemy)

Maelstrom – MP 13
Item Needed: Gold Scimitar
Creates a giant tornado. (All)

Flameheart – MP 10
Item Needed: Gold Rapier
Causes an enemy to burst into flames. (1 Enemy)

Impaler – MP 4
Item Needed: Spike Shield
Rushes at an enemy, leading with the spike shield. (1 Enemy)

Haze Flood – MP 6
Item Needed: Gold Armor
Makes it hard for enemies to see you. (Blinds+Agi-Down-All)

Eruption – MP 15
Item Needed: Claymore
Powerful Earth-based attack that hits all enemies (All)

Hiryuu Shouri Zan – MP 6
Item Needed: Benson's Sword
Benson's patented and deadly technique. (Kills 1 Enemy)

PERMANENT TECHNIQUES

Once you fulfill the conditions, you will keep these moves for the entire game.

Charge slice – MP 4
Conditions: Have Bokken equipped and know Charge-up while having won at least 7 battles in total
A swift and sure sword attack. (1 Enemy)

Stir crazy – Desperation Technique
Conditions: During the war between Salem and Greene's forces near Branchville, or in Selma Castle, fight a battle with Vance's maximum HP at least 24
A desperation strike at all one's opponents.

Thunder Slice – MP 8
Conditions: Fight 3 battles with Rapier equipped
Slices all enemies with thunder. (All)

Water Slash – MP 6 and 1 Badin of Water
Conditions: Fight 6 battles with Canteen equipped
Uses 1 badin of water to attack all enemies.

Red Crescent – MP 16
Conditions: Fight 4 battles with Scimitar equipped
100 HP damage to all enemies, reduces user HP to 1

Poison Volley – MP 11
Conditions: Fight 3 battles with Machete equipped
A massive cloud of poison against all enemies. (All)

MY OPINION: Well, you've got to use him the entire game anyway, so you've not got much choice in the matter. But he's a great damage-dealer and his Charge Slice skill is very useful for bosses. If you get the Claymore from Zebulun Cult HQ, he's an incredible powerhouse. Even if you don't, he'll still deal reliable damage with any decent sword and will likely be one of your best physical attackers.

--------------------------------------------------------------
CLIFTON [charcl]
--------------------------------------------------------------
BASE STATS:
HP: 26
MP: 11
Attack: 12
Defense: 11
Mental: 10
Agility: 15

LEVEL-UP APTITUDES:
HP: 4
MP: 2
Attack: 3
Defense: 3
Mental: 3
Agility: 3

STARTING ITEMS:
Bokken
Leather armor
Leather helmet

SKILLS:

TEMPORARY SKILLS
These will only be available when a specific item is equipped on the character in question.

Bokken Slice – MP 2
Item Needed: Bokken
A quick strike using a bokken. (1 Enemy)

Helluva Tough – MP 3
Item Needed: Gold Army Medallion
Scares the enemy and lowers their attack ability. (1 Enemy)

Blockhead – MP 4
Item Needed: Wood Helmet
A headbutt with a fancy name. (1 Enemy)

Frost Cut – MP 5
Item Needed: Short Sword
A powerful sword/ice technique (1 Enemy)

Light Flash – MP 4
Item Needed: Short Rapier
Reflect sun or moonlight from a swordblade. (Blinds All)

Strengthen – MP 1
Item Needed: Protect Ring
Strengthens defense (User)

Electric Slice – MP 5
Item Needed: Rapier
A slice using the power of electricity. (1 Enemy)

Power Healing – MP 3
Item Needed: Plate Armor
The user wills themselves just a little bit healthier. (User)

Drink Water – 1 Badin of Water
Item Needed: Canteen
Cures dehydration. (User)

Frighten – MP 3
Item Needed: Bronze Helmet
Lowers enemy attacking effectiveness. (1 Enemy)

Rapid Imaging – MP 5
Item Needed: Long Sword
Increases agility by creating temporary afterimage (User)

Lucky Break – MP 5
Item Needed: Alex Vest
Loser heroes tend to rely on this. (HP + Agility up – 1 Ally)

Gale Cleaver – MP 6
Item Needed: Buster Sword
Slashes the enemy with a gust of wind. (1 Enemy)

Immolation – MP 8
Item Needed: Silver Sword
Bathes the battle field in flames. (All)

Force Barrier – MP 3
Item Needed: Light Mail
Raises defense against most physical attacks. (User)

Randy Moss – MP 6
Item Needed: Horned Helmet
It's all or nothing with this spell on an enemy. (Kills Enemy)

Obfuscate – MP 3
Item Needed: Modified Plate Helm
A skill which causes confusion in an enemy. (1 Enemy)

Earth Breaker – MP 18
Item Needed: Broad Sword
Creates a chasm from which rocks flay at the enemy. (All)

Hailstorm – MP 10
Item Needed: Silver Armor
A powerful hailstorm overwhelms all enemies. (All)

Darkstorm – MP 10
Item Needed: Silver Rapier
Surrounds the enemy in powerful dark lightning. (All)

Muckraker – MP 6
Item Needed: Silver Scimitar
Flings slime, mud and other junk at unlucky enemy (1 Enemy)

Stonewall – MP 6
Item Needed: Silver Shield
Summons stones to form a protective wall. (All Allies)

Transcendant – MP 7
Item Needed: LeviathanTooth
A powerful strike of mystic energy (1 Enemy)

Aegis – MP 4
Item Needed: Buckler
Raises defense. (User)

Undercut – MP 4
Item Needed: Dunn's Blade
Causes an opponent to stumble. (1 Enemy)

Nightshade – MP 20
Item Needed: Dyn Ring (at night)
Causes the night itself to strike at all enemies. (All)

Photosynth – MP 20
Item Needed: Dyn Ring (at daytime)
Draws in sunlight to replenish HP. (User)

Suicide Blast - MP
Item Needed: Wakizashi
Sacrifices all HP and MP to destroy all enemies.

Rune Plague – MP 1
Item Needed: Rune Ankh
Inflicts an enemy with an ancient plague. (1 Enemy)

Maelstrom – MP 13
Item Needed: Gold Scimitar
Creates a giant tornado. (All)

Flameheart – MP 10
Item Needed: Gold Rapier
Causes an enemy to burst into flames. (1 Enemy)

Impaler – MP 4
Item Needed: Spike Shield
Rushes at an enemy, leading with the spike shield. (1 Enemy)

Haze Flood – MP 6
Item Needed: Gold Armor
Makes it hard for enemies to see you. (Blinds+Agi-Down-All)

Hiryuu Shouri Zan – MP 6
Item Needed: Benson's Sword
Benson's patented and deadly technique. (Kills 1 Enemy)

PERMANENT SKILLS:

Once you fulfill the conditions, you will keep these moves for the entire game.

Konsui Strike – MP 1
Conditions: Start
Can cause a coma if applied correctly.
*NOTE* This skill is bugged and has no effect.

Scan – MP 2
Conditions: Start
33% chance of scanning an opponent's vital info

Hammer and Sickle – Desperation Technique
Conditions: Fight 2 battles with Steel Epee equipped
Gives two devastating blows to the enemy.

MY OPINION: A completely average character. His damage output is a lot better than people like Fayette or Holly, but can't compare to Vance, North or Anderson. He makes a good filler character if you don't have anyone you particularly want in your fourth slot, but he has no outstanding qualities.

--------------------------------------------------------------
RAYNHAM [charra]
--------------------------------------------------------------
BASE STATS:
HP: 20
MP: 0
Attack: 13
Defense: 10
Mental: 5
Agility: 8

LEVEL-UP APTITUDES:
HP: 5
MP: 0
Attack: 5
Defense: 5
Mental: 1
Agility: 2

STARTING ITEMS:
Club
Leather armor
Leather helmet
*NOTE* Raynham's equipment cannot be changed.

SKILLS:
Raynham has no skills.

MY OPINION: You only have him for one dungeon, but he's useful there, and should be at least equalling Vance in the damage department.

--------------------------------------------------------------
MCDONALD [charmd]
--------------------------------------------------------------
BASE STATS:
HP: 14
MP: 20
Attack: 6
Defense: 5
Mental: 20
Agility: 9

LEVEL-UP APTITUDES:
HP: 3
MP: 5
Attack: 2
Defense: 3
Mental: 4
Agility: 2

STARTING ITEMS:
Wooden Staff
Wool Robe
*NOTE* McDonald's equipment cannot be changed.

SKILLS:

TEMPORARY SKILLS
These will only be available when a specific item is equipped on the character in question.

Static Bolt – MP 3
Item Needed: Wooden Staff
A bolt of static electricity. (1 Enemy)
*NOTE* This skill is pretty much permanent since you can't
alter McDonald's equipment, but it is technically only
there because of his weapon.

MY OPINION: Not as useful as Raynham for that one dungeon, but his Static Bolt skill can do decent damage, and he has lots of MP to use it with. Random trivia – McDonald and Raynham's equipment can't be changed, yet the game contains code for them to be able to gain all kinds of temporary skills from various equipment, and even has code for them in the water system for the desert. I have no idea why the creator would go to all that trouble for something that's never used, so I can only assume that these characters were to have a larger role at some point.

--------------------------------------------------------------
NORTH [charno]
--------------------------------------------------------------
BASE STATS:
HP: 28
MP: 8
Attack: 15
Defense: 16
Mental: 14
Agility: 16

LEVEL-UP APTITUDES:
HP: 4
MP: 2
Attack: 4
Defense: 3
Mental: 2
Agility: 3

STARTING ITEMS:
Razor Knuckles
Razor Knuckles
Kung Fu Suit
Engagement Ring

SKILLS:

TEMPORARY SKILLS
These will only be available when a specific item is equipped on the character in question.

Open Hand Strike – MP 1
Item Needed: Kung Fu Suit
Can stun an enemy. (1 Enemy)

Helluva Tough – MP 3
Item Needed: Gold Army Medallion
Scares the enemy and lowers their attack ability. (1 Enemy)

Strengthen – MP 1
Item Needed: Protect Ring
Strengthens defense (User)

Drink Water – 1 Badin of Water
Item Needed: Canteen
Cures dehydration. (User)

Lucky Break – MP 5
Item Needed: Alex Vest
Loser heroes tend to rely on this. (HP + Agility up – 1 Ally)

Dark Sphere – MP 7
Item Needed: Hooded cloak
Summons a damaging sphere of darkness. (1 Enemy)

Ice Stream – MP 6
Item Needed: Silver Vest
Fills the battlefield with ice shards. (All)

Rune Plague – MP 1
Item Needed: Rune Ankh
Inflicts an enemy with an ancient plague. (1 Enemy)

Concealment – MP 15
Item Needed: Shade Mantle
Allows one to hide and strike from the shadows. (Atk/Agi up for User)

Discomfit – MP 2
Item Needed: Guard Vest
Erratic skill lowers an enemy's attack power. (1 Enemy)

PERMANENT TECHNIQUES

Once you fulfill the conditions, you will keep these moves for the entire game.

Focus – MP 5
Conditions: Fight a battle while North's agility is at least 18
Raises battle awareness. (Attack/Mental up for User)

Helluva Punch – MP 6
Conditions: 25% chance of learning after fighting a battle while equipped with Gold Army Medallion and while North's Attack stat is at least 19
The name says it all. (1 Enemy)

KITA TECHNIQUES

These are unlocked after North learns them from Lowrys during Act 3. They depend on North's equipped weapons and his current HP. The lower his HP, the more techniques will be available.

Slingshot techniques:
100% HP or lower – Swing – MP 2
Swing the slingshot around to increase velocity. (Agility+)
50% HP or lower – Pebble Storm – MP 5
Rains pebbles on the enemy. (All)
25% HP or lower – Earth Cracker – MP 8
Slashes a chasm in the earth. (All)

Razor Knuckles techniques:
100% HP or lower – Engage – MP 10
Proper engagement of the enemy raises atk strength (User)
50% HP or lower – Blinding Pattern – MP 3
This hand kata dazzles the enemy. (Blind 1 Enemy)
25% HP or lower – Finish cut – MP 8
A desparate slashing charge at the enemy (All)

Iron Hand techniques:
100% HP or lower – Iron Shield – MP 3
Uses the "iron hands" to increase defense. (User)
50% HP or lower – Super Shield – MP 6
Iron shield technique that protects more than one. (All)
25% HP or lower – Iron Maiden – MP 8
Attacks the enemy from all angles. (All)

Spike Glove techniques:
100% HP or lower – Strategy – MP 5
Improves battle effectiveness. (Atk/Agi up, 1 Ally)
50% HP or lower – Firewall – MP 12
Creates a wall of flames on the battlefield. (All)
25% HP or lower – Frenzied Attack – MP 7
Self explantory. (1 Enemy)

Steel Gauntlet techniques:
100% HP or lower – Piledriver – MP 3
Self explanatory (Def/Mental down, 1 Enemy)
50% HP or lower – Flurry – MP ?
Damages enemies for 2-4x North's MP.
25% HP or lower – Cold Crash – MP 9
A huge blast of ice. (All)

Razor Gauntlet techniques:
100% HP or lower – Deadhand – MP 2
Instantly kills if it connects. (1 Enemy)
50% HP or lower – Triple Slash – MP 10
Rapid attack on all enemies. (All)
25% HP or lower – Corsair – MP 5
Robs HP from all enemies. (Absorb HP from all)

MY OPINION: A great damage dealer. He's not as durable nor as powerful as Anderson, but he's still a very good choice for a character slot and never fails to do great damage to enemies. Some of his Kita moves are useful too, though most of the good ones require him to be nearly dead to use, which isn't very convenient.

--------------------------------------------------------------
FAYETTE [charfa]
--------------------------------------------------------------
BASE STATS:
HP: 12
MP: 0
Attack: 4
Defense: 3
Mental: 8
Agility: 7

LEVEL-UP APTITUDES:
HP: 3
MP: 4
Attack: 2
Defense: 3
Mental: 4
Agility: 2

STARTING ITEMS:
Duchess Robe
Silk Turban
Signet Ring

SKILLS:

TEMPORARY SKILLS
These will only be available when a specific item is equipped on the character in question.

Static Bolt – MP 3
Item Needed: Wooden Staff
A bolt of static electricity. (1 Enemy)

Scalding Water – MP 7
Item Needed: Frypan
This can HURT! (All)

Kaifuku - MP 10
Item Needed: Marion's Staff
Can restore fallen comrades. (1 Ally)

Sharpen – MP ?
Item Needed: Light Jacket OR Heavy Jacket
Exchange 2-5 MP for an equivalent amount of HP.

Drink Water – 1 Badin of Water
Item Needed: Canteen
Cures dehydration.

Release – MP 2
Item Needed: Shawl
Heals paralysis (1 Ally)

Deseret – MP 5
Item Needed: Headdress
A mystical spell that can cause chaos. (All)

Morale – MP 8
Item Needed: Emerald Rod
Certainly will live up to its name by raising HP. (1 Ally)

Haste – MP 3
Item Needed: Sapphire Rod
Raises agility. (1 Ally)

Serenity – MP 2
Item Needed: Evening Gown
Cures chaos, stupor, or berzerk conditions. (1 Ally)

Escape – MP 5
Item Needed: Pixie Bracelet
Pixie magic which gives 50% chance of escaping.

Faint Hope – MP 5
Item Needed: Ivory Cane
Restores a fallen ally, but only to 1 HP.

Providence – MP 7
Item Needed: Sundress OR Silver Robe
Restores HP to entire party. (Whole Party)

Mystical Shield – MP 4
Item Needed: Zebulon Bracelet
Inc. def, especially against stat-changing spells (User)

Befuddle – MP 5
Item Needed: Long Staff
A very baffling attack to the enemy. (Berserk/Chaos-1 Enemy)

Purple Haze – MP 8
Item Needed: Murex Robe
A spell which causes enemies to lose MP. (All)

Hypnosis – MP 4
Item Needed: Kimono
Capable of putting an enemy to sleep or more. (1 Enemy)

Restoration – MP 5
Item Needed: Silver Circlet
Revives ally to a low amt. of HP. Slight + defense. (1 Ally)

Hopewell – MP 3
Item Needed: Turquoise Rod
Cures dehydr. and heat exhaust. w/o badin. (User)

Encouragement – MP 5
Item Needed: Amethyst Rod
Great healing spell...when it works. (1 Ally)

Aura Release – MP 4
Item Needed: Crystal Robe
Erratic spell heals a number of status effects. (1 Ally)

Dreamshatter- MP 6
Item Needed: Dyn Ring
Wakens the entire party. (Whole Party)

Elegance – MP 6
Item Needed: Crystal Tiara
That special quality that draws attention. (Shock All)

Dark Haze – MP 4
Item Needed: Obsidian Staff
Causes confusion in the enemy ranks. (All)

Rune Heal – MP 4
Item Needed: Rune Ankh
An ancient and powerful healing spell. (Whole Party)

Read a Passage – MP 3
Item Needed: Romance Novel
Reads a passage from a romance novel. (Silence All)

Venom Cloud – MP 5
Item Needed: Cobra Staff
Thick and poisonous. (Poison All)

Exigency – MP 12
Item Needed: Mystic Rod
Restores HP to the entire party. (Whole Party)

Gleam – MP 3
Item Needed: Gold Circlet
A blinding attack. (Blinds 1 Enemy)

PERMANENT TECHNIQUES

Once you fulfill the conditions, you will keep these moves for the entire game.

Remedy – MP 4
Conditions: Fight a battle after Marion gives Fayette her healing power and while her Mental stat is at least 18
Restores a small amount of HP. (1 Ally)

Aura Radiation – MP 6
Conditions: Fight a battle while Crystal Robe is equipped and Fayette's Mental stat is at least 26
Heals a number of status effects. (1 Ally)

Mystical Hallation – MP 24
Conditions: Fight 8 battles while Blenheim is equipped
Kills all enemies, full recovery after a few turns

MY OPINION: You'd think that Fayette, being the only healer, would be a must-have in any party, but as healers go, she's an unusual one, in that most of her decent healing spells require a certain piece of equipment to use. Without a Sundress, Silver Robe or Mystic Rod, she's pretty much completely worthless. Once you get her one of those items, though, she's a great character choice, since she'll be able to heal all the team at once, which is much more efficient than items. If you don't have one of those items on her, though, I'd recommend using someone else, since her innate healing spells aren't as effective as simply using healing items, and she can't inflict any kind of decent damage.

--------------------------------------------------------------
ANDERSON [charan]
--------------------------------------------------------------
BASE STATS:
HP: 65
MP: 0
Attack: 17
Defense: 21
Mental: 17
Agility: 22

LEVEL-UP APTITUDES:
HP: 6
MP: 0
Attack: 3
Defense: 3
Mental: 3
Agility: 3

STARTING ITEMS:
Steel Axe
Monk's Cloak
Canteen

SKILLS:

TEMPORARY SKILLS
These will only be available when a specific item is equipped on the character in question.

Drink Water – 1 Badin of Water
Item Needed: Canteen
Cures dehydration.

PERMANENT TECHNIQUES

Anderson has no permanent techniques.

MINAMI TECHNIQUES

Anderson can only use one set of these techniques at a time. You can switch between which set he uses on the Skills screen. The Bear's Paw, Crane's Fist and Tiger's Claw sets are unlocked later, though I am unsure of the exact points where they are enabled. Snake and Dragon are available throughout the whole game. These techniques also use HP rather than MP. The amount of HP used seems to be a percentage rather than a number, so I cannot give their exact cost here.

Snake Fist Techniques:
Snake Fang Strike – A fast, poisonous strike against the weakest enemy.
Snake Fang Relief – Antidote.

Dragon Fist Techniques:
Dragon Sight – Scans the enemy at 33% effectiveness.
Dragon Wing – A fierce wind attack.
Dragon's Roar – Can cause deafness in the opponent.

Tiger's Claw Techniques:
Tiger's Pounce – A quick slash using the powerful tiger's claw
Eye of the tiger – Raises attack strength.

Bear's Paw Techniques:
Ursine Fury – Increased attack and defense, but at a cost.
Ursine Maul – Capable of instantly killing an enemy.
Ursine Shield – Absorbs a party member's battle damage.

Crane's Fist Techniques:
Crane Talon Strike – Vicious strike using the Crane Fist (uses 30 HP)
Crane Fierce Flight – Fly through and lay waste to enemy lines.

MY OPINION: His skills are basically completely useless, but his durability and attack power are absolutely ridiculous, and with the Zanbattou weapon that hits all enemies, he can wipe out random encounters with ease. Probably the best character in the game.

--------------------------------------------------------------
KANNA [charka]
--------------------------------------------------------------
BASE STATS:
HP: 30
MP: 34
Attack: 14
Defense: 15
Mental: 35
Agility: 15

LEVEL-UP APTITUDES:
HP: 2
MP: 5
Attack: 2
Defense: 2
Mental: 5
Agility: 2

STARTING ITEMS:
Grimorum Folklora
Toga
Canteen

SKILLS:

TEMPORARY SKILLS
These will only be available when a specific item is equipped on the character in question.

Drink Water – 1 Badin of Water
Item Needed: Canteen
Cures dehydration.

Lullaby – MP 10
Item Needed: Songbook
Puts an enemy to sleep. (All Enemies)
*NOTE* Seems weird that the description contradicts the actual
effect, but it does.

Nanticoke – MP 5
Item Needed: Evening Gown
A mysterious spell with self-curative effects (User)

Levitation – MP 5
Item Needed: Grimorum Avia
Levitate a group of people across short distances.

Escape – MP 5
Item Needed: Pixie Bracelet
Pixie magic which gives a 50% chance of escaping.

Steadier – MP 2
Item Needed: Sundress
Selfcure for a few status ailments. (User)

Martial Call – MP 12
Item Needed: Grimorum Gladia
Summons monsters using a grimorum.

Mystical Shield – MP 4
Item Needed: Zebulon Bracelet
Inc. def., especially against stat-changing spells (User)

Boulderdash – MP 5
Item Needed: Grimorum Calculus
Use to break various rock formations.

Dawn – MP 10
Item Needed: Grimorum Chronos – night only
Changes the night to daybreak.

Twilight – MP 10
Item Needed: Grimorum Chronos – day only
Changes the day to dusk.

Remittance – MP ?
Item Needed: Crystal Tiara
Uses 3/4 MP. Restores MP of ally with lowest MP %

Nullification – MP 2
Item Needed: Rune Ankh
An ancient spell nullifying enemy magic. (Silence All)

Read a Passage – MP 3
Item Needed: Romance Novel
Read a passage from a romance novel. (Silence All)

Gleam – MP 3
Item Needed: Gold Circlet
A blinding attack (Blind 1 Enemy)

Delirium – MP 3
Item Needed: Grimorum Anathema
Can wreak havoc on an enemy's mind. (1 Enemy)

Teleportation – MP 15
Item Needed: Teleport Prism
Uses the power of the teleport prism.

PERMANENT TECHNIQUES

Kanna does not have any permanent techniques.

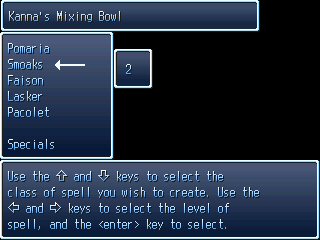
ALCHEMY

Kanna can create magical items using the Alchemy option on the Menu Prism's screen. Creating a magical item uses ingredients that are dropped by different kinds of monsters. After creating a magical item, Kanna can use it once in battle before it disappears. The Alchemy screen displays MP costs for each item – they are the MP needed to MAKE the item, not to use it in battle. All magical items but the elemental magics and Pacolet require you to obtain Arcane Scrolls to use. These are mostly obtained by killing the Kaibutsu lords.

Pomaria1 – Wind damage, lowers defense
Ingredients: Feather x 2

Pomaria2 – Wind damage, lowers defense
Ingredients: Feather x 5

Pomaria3 – Wind damage, lowers defense (All)
Ingredients: Feather x 5, Rare Essence x 1

Smoaks1 – Fire damage
Ingredients: Jalapeno pepper x 1, Ash x 1

Smoaks2 – Fire damage
Ingredients: Jalapeno pepper x 1, Ash x 2, Warm stone x 1

Smoaks3 – Fire damage (All)
Ingredients: Jalapeno pepper x 1, Ash x 2, Warm stone x 1, Rare Essence x 1

Faison1 – Earth damage
Ingredients: Quartz x 2

Faison2 – Earth damage
Ingredients: Quartz x 5

Faison3 – Earth damage (All)
Ingredients: Quartz x 5, Rare Essence x 1

Lasker1 – Water damage
Ingredients: Shell x 1, Badin x 2

Lasker2 – Water damage
Ingredients: Shell x 2, Alligator Tooth x 1, Badin x 5

Lasker3 – Water damage (All)
Ingredients: Shell x 2, Alligator Tooth x 1,
Rare Essence x 1, Badin x 5

Pacolet1 – Mystic damage, lowers attack (All)
Ingredients: Mystic Resin x 1, Eye of Newt x 1, Acorn x 1

Pacolet2 – Mystic damage, lowers attack (All)
Ingredients: Mystic Resin x 1, Eye of Newt x 1, Acorn x 1, Coconut x 1, Wax x 1, Hardened Slime x 1

Pacolet3 – Mystic damage, lowers attack (All)
Ingredients: Mystic Resin x 1, Eye of Newt x 1, Acorn x 1, Coconut x 1, Wax x 1, Hardened Slime x 1, Rare Essence x 1

Landrum – Reduces all enemy and ally HPs to 1 except Kanna.
Ingredients: Ambrosia x 6

Yutecks – Absorbs HP from enemies and inflicts confusion.
Ingredients: Ginger Root x 2, Acorn x 2, Mystic Resin x 1

Ulmer – Inc. Kanna's stats temporarily before killing her.
Ingredients: Bone x 2, Meteorite x 1, Pig's foot x 1,
Nectar x 2

Bonneau – Can cause literally anything to happen.
Ingredients: Orange Clay x 1, Venom Sac x 2,
Hardened Slime x 1

Eutaw – Quickly drains an enemy's MP.
Ingredients: Ginger Root x 2, Lard x 2

Yemassee – A very powerful light spell.
Ingredients: Dendrite x 5

Rowes – Dehydrates enemies.
Ingredients: Apple x 1, Eye of Newt x 1, Badin x 2

MY OPINION: Kanna is a weird character, that's for sure. She's useless without any magic items, but with them, she can utterly decimate anything, including even the final boss. If you're patient enough to farm the ingredients to create a lot of magic items, then use her.
She's also worth bringing to quite a few dungeons simply because there's a lot of treasure you can't get without her Levitate ability. Levitate can even be used to skip the entire final dungeon.

--------------------------------------------------------------
WHITAKER [charwh]
--------------------------------------------------------------
BASE STATS:
HP: 36
MP: 0
Attack: 15
Defense: 11
Mental: 10
Agility: 15

LEVEL-UP APTITUDES:
HP: 4
MP: 0
Attack: 4
Defense: 3
Mental: 3
Agility: 4

STARTING ITEMS:
Wooden Spear
Beaufort Armor
Beaufort Helmet

SKILLS:

TEMPORARY SKILLS
These will only be available when a specific item is equipped on the character in question.

Although Whitaker can learn various temporary skills, he has no MP to use them with, so I don't see much reason to list them here.

PERMANENT TECHNIQUES

Once you fulfill the conditions, you will keep these moves for the entire game.

Drunken Rage – Desperation Technique
Conditions: Start
A desperate lunge at the strongest enemy.

MY OPINION: For the short time you have him, he...well, doesn't do much. But that little bit of extra damage is always helpful.

--------------------------------------------------------------
GASTONIA [charga]
--------------------------------------------------------------
BASE STATS:
HP: 26
MP: 14
Attack: 10
Defense: 7
Mental: 15
Agility: 22

LEVEL-UP APTITUDES:
HP: 3
MP: 3
Attack: 3
Defense: 3
Mental: 3
Agility: 3

STARTING ITEMS:
Wooden Spear
Beaufort Armor
Beaufort Helmet
Officer's Insignia

SKILLS:

TEMPORARY SKILLS
These will only be available when a specific item is equipped on the character in question.

Defense up – MP 2
Item Needed: Hide Armor
Raises defense value. (1 Ally)

Blockhead – MP 4
Item Needed: Wood Helmet
A headbutt with a fancy name. (1 Enemy)

Strengthen – MP 1
Item Needed: Protect Ring
Strengthens defense (User)

Power Healing – MP 3
Item Needed: Plate Armor
The user wills themselves just a little bit healthier. (User)

Drink Water – 1 Badin of Water
Item Needed: Canteen
Cures dehydration. (User)

Right Guard – MP 3
Item Needed: Pike
Lowers the attack effectiveness of an enemy (1 Enemy)

Pincushion – MP 4
Item Needed: Flint Spear
A special spear attack. (1 Enemy)

Frighten – MP 3
Item Needed: Bronze Helmet
Lowers enemy attacking effectiveness. (1 Enemy)

Deseret – MP 5
Item Needed: Headdress
A mystical spell which can cause chaos. (All)

Lucky Break – MP 5
Item Needed: Alex Vest
Loser heroes tend to rely on this. (HP + Agility up – 1 Ally)

Force Barrier – MP 3
Item Needed: Light Mail
Raises defense against most physical attacks. (User)

Dark Sphere – MP 7
Item Needed: Hooded cloak
Summons a damaging sphere of darkness. (1 Enemy)

Randy Moss – MP 6
Item Needed: Horned Helmet
It's all or nothing with this spell on an enemy. (Kills Enemy)

Obfuscate – MP 3
Item Needed: Modified Plate Helm
A skill which causes confusion in an enemy. (1 Enemy)

Saturn Silence – MP 7
Item Needed: Glaive
An attempt to silence all enemies. (All)

Helluva Tough – MP 3
Item Needed: Gold Army Medallion
Scares the enemy and lowers their attack ability. (1 Enemy)

Safety – MP 5
Item Needed: Long Spear
Raises HP and defense in combat. (1 Ally)

Hailstorm – MP 10
Item Needed: Silver Armor
A powerful hailstorm overwhelms all enemies. (All)

Aegis – MP 4
Item Needed: Buckler
Raises defense. (User)

Electrical Thrust – MP 7
Item Needed: Trident
Discharges electricity from the end of a trident. (1 Enemy)

Ice Stream – MP 6
Item Needed: Silver Vest
Fills the battlefield with ice shards. (All)

Impaler – MP 4
Item Needed: Spike Shield
Rushes at an enemy, leading with the spike shield. (1 Enemy)

Discomfit – MP 2
Item Needed: Guard Vest
Erratic skill lowers an enemy's attack power. (1 Enemy)

Haze Flood – MP 6
Item Needed: Gold Armor
Makes it hard for enemies to see you. (Blinds All)

PERMANENT TECHNIQUES

Once you fulfill the conditions, you will keep these moves for the entire game.

Scan – MP 2
Conditions: Fight 2 battles with Officer's Insignia equipped
33% chance of scanning an opponent's vital info

MY OPINION: Like Whitaker, she's not particularly good for the short time you have her, but the extra damage is never a bad thing. I'd say Whitaker's slightly more useful because his better Attack stat is more useful than Gastonia's access to (mostly useless) skills.

--------------------------------------------------------------
HOLLY [charho]
--------------------------------------------------------------
BASE STATS:
HP: 26
MP: 6
Attack: 8
Defense: 9
Mental: 9
Agility: 22

LEVEL-UP APTITUDES:
HP: 3
MP: 3
Attack: 2
Defense: 3
Mental: 2
Agility: 5

STARTING ITEMS:
Dirk
Thief's Cloak

SKILLS:

TEMPORARY SKILLS
These will only be available when a specific item is equipped on the character in question.

Drink Water – 1 Badin of Water
Item Needed: Canteen
Cures dehydration.

Frighten – MP 3
Item Needed: Bronze Helmet
Lowers enemy attacking effectiveness. (1 Enemy)

Deseret – MP 5
Item Needed: Headdress
A mystical spell which can cause chaos. (All)

Dark Sphere – MP 7
Item Needed: Hooded cloak
Summons a damaging sphere of darkness. (1 Enemy)

Obfuscate – MP 3
Item Needed: Modified Plate Helm
A skill which causes confusion in an enemy. (1 Enemy)

Escape – MP 5
Item Needed: Pixie Bracelet
Pixie magic which gives a 50% chance of escaping.

Strengthen – MP 1
Item Needed: Protect Ring
Strengthens defense (User)

Quicksilver – MP 5
Item Needed: Thief's Mantle
Increases your speed during combat. (User)

Mystical Shield – MP 4
Item Needed: Zebulon Bracelet
Inc. def, especially against stat-changing spells (User)

Poison Strike – MP 7
Item Needed: Machete
Can poison an enemy. (1 Enemy)

Aegis – MP 4
Item Needed: Buckler
Raises defense. (User)

Darkstorm – MP 10
Item Needed: Silver Rapier
Surrounds the enemy in powerful dark lightning. (All)

Stonewall – MP 6
Item Needed: Silver Shield
Summons stones to form a protective wall. (All Allies)

Spincut – MP 8
Item Needed: Kodachi
Self explanatory. (1 Enemy)

Mist Blast – MP 4
Item Needed: Crystal Robe
Summons a strange and poisonous mist. (1 Enemy)

Undercut – MP 4
Item Needed: Dunn's Blade
Causes an opponent to stumble. (1 Enemy)

Nightshade – MP 20
Item Needed: Dyn Ring (at night)
Causes the night itself to strike at all enemies. (All)

Photosynth – MP 20
Item Needed: Dyn Ring (at daytime)
Draws in sunlight to replenish HP. (User)

Elegance – MP 6
Item Needed: Crystal Tiara
That special quality that draws attention. (Shock All)

Suicide Blast - MP
Item Needed: Wakizashi
Sacrifices all HP and MP to destroy all enemies.

Rune Slash – MP 1
Item Needed: Rune Ankh
Uses the power of the rune ankh to slash an enemy. (1 Enemy)

Flameheart – MP 10
Item Needed: Gold Rapier
Causes an enemy to burst into flames. (1 Enemy)

Impaler – MP 4
Item Needed: Spike Shield
Rushes at an enemy, leading with the spike shield. (1 Enemy)

Gleam – MP 3
Item Needed: Gold Circlet
A blinding attack. (Blinds 1 Enemy)

Concealment – MP 15
Item Needed: Shade Mantle
Allows one to hide and strike from the shadows. (Atk/Agi up for User)

Discomfit – MP 2
Item Needed: Guard Vest
Erratic skill lowers an enemy's attack power. (1 Enemy)


PERMANENT TECHNIQUES

Once you fulfill the conditions, you will keep these moves for the entire game.

Filch - MP 1
Conditions: Start
Try your luck at stealing from the enemy.

Poison Volley – MP 11
Conditions: Fight 3 battles with Machete equipped
A massive cloud of poison against all enemies. (All)

MY OPINION: Completely useless. Her stats suck, and her skills suck too. She seems to be intended to be used for stealing, but I've never seen her steal successfully once. Don't even bother trying to use her.

--------------------------------------------------------------
TATUM [charta]
--------------------------------------------------------------
BASE STATS:
HP: 38
MP: 17
Attack: 13
Defense: 16
Mental: 18
Agility: 24

LEVEL-UP APTITUDES:
HP: 4
MP: 3
Attack: 3
Defense: 3
Mental: 2
Agility: 3

STARTING ITEMS:
Light Bow
Chain Mail
Headband
Bandit Queen Ring

SKILLS:

TEMPORARY SKILLS
These will only be available when a specific item is equipped on the character in question.

Defense up – MP 2
Item Needed: Hide Armor
Raises defense value. (1 Ally)

Helluva Tough – MP 3
Item Needed: Gold Army Medallion
Scares the enemy and lowers their attack ability. (1 Enemy)

Blockhead – MP 4
Item Needed: Wood Helmet
A headbutt with a fancy name. (1 Enemy)

Strengthen – MP 1
Item Needed: Protect Ring
Strengthens defense (User)

Power Healing – MP 3
Item Needed: Plate Armor
The user wills themselves just a little bit healthier. (User)

Drink Water – 1 Badin of Water
Item Needed: Canteen
Cures dehydration. (User)

Frighten – MP 3
Item Needed: Bronze Helmet
Lowers enemy attacking effectiveness. (1 Enemy)

Lucky Break – MP 5
Item Needed: Alex Vest
Loser heroes tend to rely on this. (HP + Agility up – 1 Ally)

Force Barrier – MP 3
Item Needed: Light Mail
Raises defense against most physical attacks. (User)

Release – MP 2
Item Needed: Shawl
Heals paralysis (1 Ally)

Deseret – MP 5
Item Needed: Headdress
A mystical spell that can cause chaos. (All)

Randy Moss – MP 6
Item Needed: Horned Helmet
It's all or nothing with this spell on an enemy. (Kills Enemy)

Obfuscate – MP 3
Item Needed: Modified Plate Helm
A skill which causes confusion in an enemy. (1 Enemy)

Hailstorm – MP 10
Item Needed: Silver Armor
A powerful hailstorm overwhelms all enemies. (All)

Elegance – MP 6
Item Needed: Crystal Tiara
That special quality that draws attention. (Shock All)

Gleam – MP 3
Item Needed: Gold Circlet
A blinding attack. (Blinds 1 Enemy)

Concealment – MP 15
Item Needed: Shade Mantle
Allows one to hide and strike from the shadows. (Atk/Agi up for User)

Haze Flood – MP 6
Item Needed: Gold Armor
Makes it hard for enemies to see you. (Blinds+Agi-Down-All)

Nightshade – MP 20
Item Needed: Dyn Ring (at night)
Causes the night itself to strike at all enemies. (All)

Photosynth – MP 20
Item Needed: Dyn Ring (at daytime)
Draws in sunlight to replenish HP. (User)

Arrow Storm – MP 9
Item Needed: Light Bow
Fires arrows quickly at all enemies. (All)

Special Targeting – MP 10
Item Needed: Any bow
After 2 turns, always hits; damage = current HP.

Rainbow Arrow – MP 8
Item Needed: Chroma Vest
An arrow amplified by light magic. (1 Enemy)

Skyfire – MP 7
Item Needed: Siege Bow
Fires a burning arrow at an enemy. (1 Enemy)

Exploding Arrow – MP 6
Item Needed: Silver Bow
Highly accurate attack which burns an enemy (1 Enemy)

Rune Arrow – MP 1
Item Needed: Rune Ankh
Causes instant death in its target if it hits. (1 Enemy)

Strafing Arrow – MP 5
Item Needed: Gold Bow
Can disrupt an enemy's battle strategy. (1 Enemy)

PERMANENT TECHNIQUES

Once you fulfill the conditions, you will keep these moves for the entire game.

Piercing Shot – MP 5
Conditions: Fight 4 battles with Long Bow equipped
When this arrow hits, it always kill its target. (1 Enemy)


MY OPINION: Her stats aren't anything special, and neither are most of her temporary skills, but Piercing Shot is one of the most accurate instant-death attacks in the game, and it's pretty cheap too. She's worth using occasionally just for that. Obviously it doesn't work on bosses, but most of the bosses in this game are jokes anyway.

--------------------------------------------------------------
ROPER [charro]
--------------------------------------------------------------
BASE STATS:
HP: 47
MP: 17
Attack: 15
Defense: 15
Mental: 22
Agility: 29

LEVEL-UP APTITUDES:
HP: 4
MP: 3
Attack: 2
Defense: 2
Mental: 3
Agility: 4

STARTING ITEMS:
Glaive
Captain Uniform

SKILLS:

TEMPORARY SKILLS
These will only be available when a specific item is equipped on the character in question.

Escape – MP 5
Item Needed: Pixie Bracelet
Pixie magic which gives 50% chance of escaping.

Drink Water – 1 Badin of Water
Item Needed: Canteen
Cures dehydration.

Saturn Silence – MP 7
Item Needed: Glaive
An attempt to silence all enemies. (All)

Strengthen – MP 1
Item Needed: Protect Ring
Strengthens defense (User)

Off-key – MP 6
Item Needed: Brass Circlet
Noise polution. (1 Enemy)

Safety – MP 5
Item Needed: Long Spear
Raises HP and defense in combat. (1 Ally)

Right Guard – MP 3
Item Needed: Pike
Lowers the attack effectiveness of an enemy (1 Enemy)

Pincushion – MP 4
Item Needed: Flint Spear
A special spear attack. (1 Enemy)

Mystical Shield – MP 4
Item Needed: Zebulon Bracelet
Inc. def, especially against stat-changing spells (User)

Purple Haze – MP 8
Item Needed: Murex Robe
A spell which causes enemies to lose MP. (All)

Hypnosis – MP 4
Item Needed: Kimono
Capable of putting an enemy to sleep or more. (1 Enemy)

Lembawe – MP 3
Item Needed: Silver Circlet
As name implies, reduces intelligence of an enemy. (1 Enemy)

Mist Blast – MP 4
Item Needed: Crystal Robe
Summons a strange and poisonous mist. (1 Enemy)

Electrical Thrust – MP 7
Item Needed: Trident
Discharges electricity from the end of a trident. (1 Enemy)

Nightshade – MP 20
Item Needed: Dyn Ring (at night)
Causes the night itself to strike at all enemies. (All)

Elegance – MP 6
Item Needed: Crystal Tiara
That special quality that draws attention. (Shock All)

Ice Stream – MP 6
Item Needed: Silver Vest
Fills the battlefield with ice shards. (All)

Rune Plague – MP 1
Item Needed: Rune Ankh
Inflicts an enemy with an ancient plague. (1 Enemy)

Read a Passage – MP 3
Item Needed: Romance Novel
Reads a passage from a romance novel. (Silence All)

Gleam – MP 3
Item Needed: Gold Circlet
A blinding attack (Blind 1 Enemy)

Concealment – MP 15
Item Needed: Shade Mantle
Allows one to hide and strike from the shadows. (Atk/Agi up for User)

PERMANENT TECHNIQUES

Roper has no permanent techniques.

MY OPINION: Like Clifton, she's extremely average. Use her as a filler when you've got nobody you want in the fourth slot. You can't get both Clifton and Roper on the same playthrough, by the way – I'd recommend getting Roper, a) because her story is a lot more interesting, and b) because her damage output is slightly better.
User avatar
loof123
PhysicMage of Arkadya
 
Posts: 5803
Joined: Tue Sep 22, 2009 7:55 pm

Re: Three The Hard Way

Postby loof123 » Wed Aug 11, 2010 6:42 pm

WALKTHROUGH – ACT ONE [wk1]

-------------------------------------------------------------
SEARCHING FOR NORTH [a1p1]
-------------------------------------------------------------

Somerset
--------
Okay, after the intro, you'll have control of Vance. There's no items or even any shops in this place yet, but talk to the NPCs if you want.

Go to North's house, the one directly west of Vance's. Talk to North's dad, then head upstairs. Go back down and talk to him again. Then, leave the town, and go south on the world map to a forest.

Somerset Forest
---------------
Talk to the weird guy in sunglasses for a tutorial. He'll then ask you to choose a difficulty. This guide will assume you're on Easy, because Hard is more annoying than genuinely difficult. It doesn't actually affect enemy difficulty, except for slightly increasing boss stats, but makes puzzles more irritating than usual and does some other pointless little things. There's really no point bothering.

Anyway, walk around and kill some Slimes for stat-ups. You'll also get Hardened Slimes, which you can use for medicine (you'll know how this works if you talked to the shop owner in Somerset). Some people seem to believe that the stat-up system works like FF2, where your actions in battle affect which stats increase...it doesn't, it's randomly selected, with each character being more likely to get some stats than others. To see everyones' level-up aptitudes, go to the Characters section.

Head down on to the next screen and get the chest containing a TONIC. Try not to use it before you get to the boss, since you'll probably need it there and there aren't any more in this place. If you desperately need healing, go back to Somerset and sleep in Vance's bed.

Now head down, right and up, back on to the screen you were on before. Get the SCRAPER from the chest and go back down. Take the southwest exit, then go down and left to the next screen. Use the scraper on the sign to reveal the directions, then follow them – Up, Down, Left, Left, Down, Left. If you mess up, go right and then back left to reset it.

There's a save point here, so use it. If you need healing, don't bother – there's a boss coming up which fully heals you before the fight. All bosses do this, so keep that in mind. Now head down and keep going.

BOSS: RATTLER
Just keep attacking it. If your HP gets low, use that Tonic from the chest. If you used it in the forest, then you can still do this fight...you'll just need a little luck, and possibly some better stats as well.

Now head down and out of this place.

World Map
---------
To the southwest, there's a little patch of green in the middle of the brown path. Go on to the green space to get into a secret area. Get the chest for a ROPE, then use the Rope to get up to the SKILL SCROLL. This contains the skill "Charge-up" – you could save it for another character, but I recommend giving it to Vance, since this will later allow him to learn "Charge slice", a useful attack that lowers enemy defense.

Vance's mom's house is to the east, but she's not in at the moment, so there's not much reason to go there. An optional dungeon, Selma Castle, is also to the south, but you'll probably want to wait until you have another party member to go in there. For now, go southwest through the mountains, then west to Branchville.

Branchville
-----------
As soon as you enter this town, a kid will steal most of your cash. Don't worry about it – you'll get it back later.
There's an item shop here where you can make Tonics, so go ahead and do so if you want, though bear in mind it costs money as well as ingredients. It's only open at daytime – if it's night, wait to go there another time, since you need it to be night to continue the story. If you want to change it from day to night, just rest at the inn. At night, the pub is open – go in, and talk to the purple-haired guy. After a scene, you'll wake up downstairs. Talk to the woman and, after some dialogue, you'll be a bounty hunter, changing Vance's class from Bartender to Hunter. Get the REVIVE in the bottom-left corner of this place while you're here. You have three jobs to complete – I'd recommend doing them in the order they're shown, since that's pretty much order of difficulty.

-------------------------------------------------------------
BOUNTY HUNTERS [a1p2]
-------------------------------------------------------------

Job 1: Missing Person
---------------------
This one's easy. From the pub, go left, then down until you reach a row of houses. The one just left of you is the one you want. Go in and watch the scene, and then go ahead and pick up the TONIC chest lying in here. Then go back to Lauren and get your 25 GP reward. Go ahead and buy some new equipment from the weapon shop (open at night) – you'll especially want the Bokken, since you'll need it to learn a new technique later on, and it also grants your first temporary skill, "Bokken slice". Also, while you're here, go to the pub and talk to the bartender. Buy some Sake. You'll want it later.

Job 2: Missing Pet
------------------
The house you want for this one is the one furthest to the southeast of the west part of town. Go in and talk to the man, then head out and examine the well. You'll jump down it, and Clifton will join you. Don't bother with his "Konsui Strike" – it's bugged. Don't bother with "Scan", either, since it's only got a 33% chance of working, and even then, only tells you HP of normal enemies, and not bosses. "Bokken slice" is a decent attack, though, and Vance should have it too if you bought the Bokken from the weapon shop.

On the way through this dungeon, assuming you gave Vance the skill scroll and he has the Bokken, you'll learn "Charge slice" at some point. It's not worth the MP cost for random battles, but its defense-lowering property is very helpful for bosses.

Notice the green path in the first room of the dungeon. It seemingly leads to a wall – follow it, however, and you'll discover a secret room. Get the chest for HIDE ARMOR. It's not as strong as the Leather armor you may already have bought, but it gives the skill "Defense up". It's up to you whether you'd rather have the extra defense or the skill. Head back out of this room, and exit north.

Take the east path for 10 GP and an ANTIDOTE. Then head back and take the west path. There's an easy little puzzle here – you've got infinite moves to do it, so you shouldn't have any trouble at all. Now continue and follow the path. Use the save point and get ready for a boss.

BOSS: SANSHOUO
Use Vance's "Charge slice" to lowers its defense, then "Charge-up" until you run out of MP, then keep attacking it. Clifton should use "Bokken slice" until he runs out of MP, then keep attacking. Use tonics if you need them.

After the scene, head back out of the well. Just before you leave the well, unequip all Clifton's stuff, since he's about to leave.

After you get out, go back to the house where you got the job and go upstairs. You'll get the money that the kid stole from you, and you'll also get 25 GP from the chest. Go back to Lauren and take the third job. Go ahead and sell all Clifton's equipment, unless he's got anything that's better than what Vance has, in which case, equip that and sell the rest.

Job 3: Escort
-------------
After taking the job, exit the town and talk to the old man. McDonald and Raynham will join you. McDonald's weak, but his Static Bolt skill can cause paralysis, and it does good damage too. Raynham has no skills, but does great damage with his normal attack. With both of them, you should be able to kill any monsters you encounter in the next dungeon without much trouble, assuming Vance's stats and equipment are stronger from beating the well.

Head south to Elloree Pass. You'll probably encounter some bandits on the way, but they shouldn't be much trouble.

When you enter, go left and get the ROPE. Then go up the stairs and use the rope to get up to the cave. Inside, go east, then east again. Then go in to the northern door, and go north.

On the next screen, head down, then take the eastern path for some LEATHER GLOVES. Go back, then down again, and take the next eastern path for a DIAMOND TILE. Go back and down again, then take the southwest path when you can for another DIAMOND TILE. Go right and up, then go right a little and take the path north for a third DIAMOND TILE. Go back down and take the southeast path for another DIAMOND TILE. Then take the northeast path and go right for a TONIC. After that, go north and enter the door.

Place the first Diamond Tile on the only space you can. Then place another tile on the southern space. Finally, place another tile on the tile in the southwest corner of the area it takes you. Then head east.

Press the switch and go south. The diamond tile here teleports you back to the start, if for some reason you want to go back. Go east, use the save and head out. Get the TONIC and then exit south. After McDonald explains about the three dukes, you'll get into another boss battle.

BOSS: BANDIT x 5
Easy. It's just like the random bandits you've been fighting in the dungeon, but more of them. You shouldn't have any trouble with this, especially since you don't need to worry about MP, so you can spam Vance's and McDonald's skills as much as you like.

Now go to Elloree.

Elloree
-------
McDonald and Raynham will leave when you enter, but you couldn't have stolen their equipment anyway, as it's locked to them.

Go into the house in the far east and up the stairs to get a WOOD SWORD. It's stronger than the Bokken, but doesn't give any skills – your choice whether to equip it or not. Then go into the far west house and talk to McDonald for your 25 GP. Finally, head out of Elloree via the northern exit. When you enter, notice the red path that branches right at one point – try to move right into the wall at that point to get into a secret room with a VENOM SAC. Then just follow the path north and go back to Branchville.

Branchville
-----------
Go to the pub and talk to Lauren. Then, go back to Somerset Forest, to the north.

Somerset Forest
---------------
You'll go in via a back route this time. There's a chest with a SHIV right near you, so pick it up. Shivs are battle items that sometimes instantly kill enemies. Go up and over the log, then head back through the forest to Somerset.

Somerset
--------
Go into Vance's house and talk to his dad to get some CUMBERLAND. Also, if it's night, talk to the brown-haired guy sitting across from the blue-haired one. Talk to him three times for 5 GP. Then head over to North's house and try to sell it to North's dad. He'll take it, but won't pay you anything. After the conversation, leave North's house. After a scene, North will join you. Now head back through the forest and go to the house just to the east.

Vance's Mother's House
----------------------
Go inside, and watch the scene. Then pick up the REVIVE in here, and get out.

World Map
---------
You're now able to do the Cumberland sidequest – it doesn't give much in the way of gameplay rewards, but it's worth playing for the story if you've never done it before. If you don't want to do the sidequest, skip to [a1p3]. To do the sidequest, go to the southwestern area of the world map. You'll see a green area – step in and talk to the guards. After the scene, they'll let you through, so go southeast to the town next to the bridge.

Halifax Township
----------------
Get two HARDENED SLIMES from the leftmost barrel in this town. Go into the inn and watch the scenes. Then, exit the screen north, and watch another scene. Talk to the kid on the left for a TONIC. Then go talk to Vance's mom and watch the scenes. You'll now be in control of North. Exit to the world map, and go southwest to the lighthouse.

Halifax Lighthouse
------------------
Talk to Baron Aiken, and Vance will rejoin you. Then, enter the lighthouse.

Go up the stairs. Take the left door and go up the stairs there. Then go one room left and go down the stairs. Pick up the WOOD SWORD. You should already have one from Elloree, but hey, at least you can sell it. Backtrack to the first room and take the right door this time. Go up the stairs. Go right one room and up the north-eastern stairs. Move 2 spaces left, 1 down, 2 left, 4 down, 4 right and 3 up to get a POTION, an item that heals the whole party. Nice. Go back down the stairs, then move one room left and go down. Go left and up the stairs. Move one room left and down the stairs. Continue going down the stairs until you reach a loom. Examine it, then head back up the series of stairs. Go right one room and down the stairs. Go right, then up one room and right one room. Go down the southwestern stairs. Move down one room and up the stairs. Then go up some more stairs. Use the save point, then head up the stairs in the room to the north.

BOSS: STRIFE DRAGON
Do whatever you want. You can't kill it, but it can't do much to you either. After a while, Sardinia will sing to it, making it flee.

Watch the scenes. Agree to accompany North to the mountain. Exit the town east, and then attempt to head up the mountain. Watch some more scenes, and the sidequest's over.

-------------------------------------------------------------
JOURNEY TO BURLINGTON [a1p3]
-------------------------------------------------------------

World Map
---------
Go to the eastern part of the world map and try to cross the bridge. The guards won't let you past, so go back to Branchville.

Branchville
-----------
Go into the pub. North will leave when you enter, but he rejoins when you leave. Go downstairs and talk to Lauren for two more jobs. I assume you're doing them in order, so...

Job 4: Lost Wedding Ring
------------------------
Go into the house directly east of North and Cary's place. Talk to the man and you'll wind up at the lake. This is a weird little minigame where you can't go in the opposite direction to the arrow. It's mostly down to luck, so keep trying. There are a lot of different ways to get to the house, so just go whichever way you want. When you get to the house, examine the bed for the PANTIES, then examine each of the cupboards at the north end until you find the one with the WEDDING RING. You'll return to the guy's house. If you got the panties, you'll be rewarded with 50 GP, otherwise, you get 25. Job over.

Job 5: Farm Troubles
--------------------
The farm's at the far west area of the world map. Go inside and watch the scenes.

BOSS: GAROU
Standard boss procedure. Vance uses "Charge-up" and "Charge Slice", North just keeps attacking. No problem.

Go back inside and talk to the shepherd for 25 GP. Pick up the REVIVE in this room, too. Job over.

Branchville
-----------
Once you finish both jobs, go back to the pub and talk to Lauren. Then go back into the house where you started the wedding ring quest. Go upstairs and talk to the guy's wife. Head back to the farm and pick up the WOOL, then go back to the wife and you'll pay her 150 GP to make you some clothes. If you have less than 150, she'll just take whatever you do have. After a few scenes...

War
---
Don't run into Duke Greene's soldiers (the ones in green armour) or you'll lose HP. This is a great place to grind, as the enemies seem to keep giving stat-ups for a long time, and they drop Tonics too, so you'll have no trouble keeping your HP up. Grind here while you can, since you won't be able to come back after you're done here. You'll likely learn the desperation technique "Stir Crazy" here, which you'll probably never actually use. Once you're done grinding, just keep going north until you get out of this screen. More scenes.

Aftermath
---------
After the scene, pick up the SHIV, and exit south. Now's a good time to do that optional dungeon I mentioned earlier. If you don't want to, then go to Branchville and skip the next section.

Selma Castle
------------
Selma Castle's just south of the bridge leading towards Burlington – the one the guards wouldn't let you pass through. Note that you can't get in here unless you talked to Vance's mom earlier.

On the first screen, pick up the TONIC in the southwest corner, and the ALEX VEST in the southeast. Then enter the castle. Go up either staircase, then kill both golems and push the rocks on to the holes in the floor. The rocks will land on the switches, activating the bridge. Go downstairs and cross the bridge. Use the save point, then head north. The chests in here are all empty, so watch the scene, then exit this place and head to Branchville.

Branchville
-----------
Go talk to the wedding ring guy's wife again and you'll get two GOLD ARMY MEDALLIONS. They lower your stats, but grant the "Helluva Tough" skill. If you equip one on North and fight some battles, he'll eventually learn "Helluva Punch" permanently, which is a decent skill, so at least put one on him until he learns that. Now head back to the bridge to Burlington. The guards are gone now, so just walk over. On the world map, go into the nearby town.

Darlington
----------
Buy anything you want here. I recommend the Short Sword especially, since it gives Vance the "Frost Cut" skill, which causes paralysis. This makes early-game bosses jokes, since they aren't immune to it.

Examine the well here for a BASKETBALL, then give it to the kid near the entrance. You don't get anything for this, so I have no idea why it's there, but you can do it anyway. You can even keep getting more basketballs from the well and giving them to him, but it still doesn't do anything.

Exit south, and talk to the sailors. The ferry isn't running, so you've got to walk. Exit this place and head south until you reach another area. If you run into a little secret area with a chest, DON'T open it. You'll be better off getting it later on.

North of Burlington
-------------------
Walk left over the bridge, then walk down. Move down another screen, then go east. There's an item shop and inn here. Do what you want here, then go east again. Go down the steps and exit west.

Walk left and then go down on to the mini-maze. Go left, down, then right and follow the path until you can go either left or right. Go right and get 15 GP, then go back left. Go down a while and follow the path left when you can. Keep going until you can go either north or south. Go north and follow the path to a chest containing either one or two HARDENED SLIMEs. I'm not sure what affects what number you get, but hey, not like they're particularly rare anyway when you can farm them easily in Somerset Forest. After that, go back and take the south path this time into an underground area.

Go left, then down and up the stairs. Outside, follow the path to an IRON KEY, then go back to the underground area. From the stairs, go up, left, down to get a SHIV. Then go up, left, up, left and up the stairs. Follow the path east to a FRYPAN. Don't sell this, even though it seems useless right now – you'll see why later. Head back underground.

Head to the southeast of the underground area and use the iron key on the lock here. Now go left, up, left, down, left, down, left, up to the save point. Go down, right, down, left towards the exit.

BOSS: BONETHUG
Use Vance's "Frost Cut" to paralyse it, then just keep attacking it. Easy.

Go left and up, and you're outta there. Move left, walk over the log and you're on the world map again. Walk down and left, and enter Burlington.

Burlington
----------
First off, do NOT get the chest on top of the house in the southwest corner. Buy anything you want in the shops here, then head up the stairs in the northwest corner of town. Talk to the red-armoured soldier standing near the northeast part of this area and fight him. Just use Vance's "Frost Cut" to paralyse him, then keep attacking. He'll give you the LUCKY SWORD, an awesome weapon that has a high critical rate and sometimes instantly kills enemies.

Now go back to the main area of Burlington and take the stairs near the southwest corner of town. Follow the path up, and you'll reach the castle. Go inside.

Take the left door, then go up the stairs. Behold the huge line of doom. Equip the Gold Army Medallions on both Vance and North, and also, equip the Alex Vest on North. Then talk to the guards guarding the southeast exit. They won't let you through, and you'll be asked whether to wait in line or leave. It doesn't really affect anything, but choose to wait if you want an extra scene.

A ton of scenes follow, and...

Ship
----
Go down and get the TONIC. Use the save, too. Then go north and talk to the guy who looks like a pirate. If you have some Sake, you'll get 11 GP. Now head up on deck. Talk to North, then head back downstairs. Yet more scenes.

--------------------------------------------------------------
MARION'S ISLAND [a1p4]
--------------------------------------------------------------

Marion's Island
---------------
Well, North's gone, and you've got Fayette instead. Her stats are horrible at the moment, but they'll get better soon. Hopefully you did as I said and kept the Frypan – equip it on her and she'll gain the "Scalding Water" technique, allowing her to at least do something in battle.

Use the save, then exit to the east. Go north from here. At the junction, go east and talk to the blue-haired woman.

*NOTE* Completely irrelevant to the guide, but for some reason this event has a note inside that says "bahamut lagoon has cool graphics, but it's a really boring game". No idea what it's doing there, but it was pretty bizarre seeing it there.

Anyway, head west two screens, then north, then east. Get the TONIC in the bottom-left. Enter the cave. Use the save point and talk to Marion. You'll get a really weird mini-game. You've got to hit the shell into the grass 5 times without hitting it into the wall or touching the boulders. The best advice I can give you here is to try and hit it into the grass from below rather from the side, because getting it into the right position to hit from the side can easily accidentally make you hit it into the wall. If you win 5-0, you'll get MARION'S STAFF, which will give Fayette the "Kaifuku" skill when equipped on her. This skill revives fallen allies.

Now that that's done, Fayette's stats will become less worthless. Head back to Marion's shrine. On the way, Fayette will most likely learn her first healing spell, "Remedy".

Talk to Marion and end the first act.
User avatar
loof123
PhysicMage of Arkadya
 
Posts: 5803
Joined: Tue Sep 22, 2009 7:55 pm

Re: Three The Hard Way

Postby loof123 » Wed Aug 11, 2010 6:43 pm

WALKTHROUGH – ACT TWO [wk2]

-------------------------------------------------------------
LOOKING FOR DUKE WINSTON [a2p1]
-------------------------------------------------------------

Edisto
------
The medicine shop here sells Mahou Spice, an MP healing item, which is good to have. The equipment shop sells a lot of good stuff, so buy whatever you want from there. I'd keep the Lucky Sword over any other weapon they have there, though, since its critical rate and instant-death chance are much more useful than a little extra power.

There's a guy in the southeast corner of town who asks you for 5 GP. Definitely worth it, because if you come back here later and talk to him again, he'll give you a load of great items.

Just northeast of that guy is a cave. Go through and head up the stairs to get to a graveyard. Examine the grave with the flowers to get a PROTECT RING.

Now, to continue with the story... if it's not daytime, go to the inn and make it so. Then talk to the blue-haired woman in the top-right corner of the west section of town. Now leave Edisto using the eastern exit.

World Map
---------
Notice the tiny little gap in the mountains just southeast of you? Go in there to get to a secret area where you can find a SKILL SCROLL. This one teaches "Antidote", and I think it should be pretty obvious what that does. Fayette's the only character who can use this, so go ahead and give it to her.

There's a really obscure secret area just east of that one, but it's not particularly worth getting there. Still, here are the directions – From the little patch of trees near Edisto, go 3 spaces right, 1 down, 3 right, 1 up, 2 right, 1 down, 1 right, 2 down, 5 right, 1 down. The chest here gives 9 GP. If you're on hard mode, you have to fight a mimic first. It's got crazy defense, but only 4 HP, so you shouldn't have too much trouble killing it.

Now go northeast from there to get to Wilmington.

Wilmington
----------
Examine the well here for 4 GP. Now go up the stairs, and enter the house on the right. Pick up the REVIVE and leave. Now enter the inn on the left. If it's daytime, rest to make it night, then go downstairs. Talk to the red-haired woman. If you already paid for the inn, go upstairs, otherwise, pay and then go upstairs. While you're upstairs, go in the middle room and pick up a TONIC. Now, go into the door on the far left. Well, look who it is...

--------------------------------------------------------------
QUEST FOR THE KIBOU [a2p2]
--------------------------------------------------------------

Wilmington
----------
After the scenes are over, head downstairs and Gastonia and Whitaker will join. You could just go to Lumbee to carry on the story, but obviously, you want to do the optional jobs, right? RIGHT? Of course you do. Talk to Florence to access the four jobs. I'll cover them in the order they're listed, but do them in whatever order you want.

Job 6: Richland Statue
----------------------
Ugh, I hate this one. Doing that rock puzzle over and over again as you go back and forth through the tunnel's just plain annoying. Oh well, here we go.

Head southwest and enter the gap in the mountains.

DON'T get the chest through the door on the right here. Instead, go through the door on the left. Talk to the weird blue monster thing to make bridges across the lava. The chest in the middle is a Mimic, the other two each contain a ROPE. Get both ropes and use them to get down the mountain. Enter the doorway here.

Use the save, then head east. Well lookie here, a rock puzzle. How fun. Ugh, describing how to get through this is really annoying, even though it's not actually that hard to figure it out. Here we go...

Move down 2, right 3, down 1.
Push the rock you're facing down 1.
Move 1 left.
Push the rock you're facing left 2.
Face down.
Push the rock you're facing down 1.
Move 1 left, 1 down, 1 left, 1 down.
Push the rock you're facing down 2.
Face right.
Push the rock you're facing right 1.
Face down.
Push the rock you're facing down 1.
Move 1 right.
Face down.
Push the rock you're facing down 2.
Face right.
Push the rock you're facing right 1.
Face down.
Push the rock you're facing down 1.
Face right.
Push the rock you're facing right 1.
Move 2 down.
Push the rock you're facing down 1.

Now the path should be clear for you to get out of here. Head down to Richland.

Go east a little and go through the gap in the houses for a TONIC. Now come back and go into the third house from the left. Examine the pot in the top left to find a secret staircase. Go down it and get the MYSTIC RESIN. Then go back out.

Now go into the inn and talk to the baron. He's in the top-right corner. Go back on to the world map, and head northwest. You should find a little barn. Pick up the two flowery things here for two GINGER ROOTS. Now go back into the cave and all the way back through the rock puzzle. Talk to the weird blue thing in the lava room. If you still have the Short Sword, equip it.

BOSS: MUTANT SLIME
If you have the Short Sword on, just use "Frost Cut" to paralyse, then kill it.
If you sold it or whatever, you still won't have too much trouble. Just fight it like you would any other boss. Vance can "Charge-up" a few times and then use "Charge slice", while Fayette attacks or heals.

Now go back into the cave. In the first room, walk four spaces left from the entrance and examine the wall there. You'll find the statue. Go back through the rock puzzle again (ugh), then go into the inn and talk to the baron. After the conversation, you'll get 50 GP. Head back through the rock puzzle for the last time and get back to Wilmington.

Job 7: Mysterious Northern Tower
--------------------------------
Head into the forest-like area to the east of Wilmington. You have to pay 15 GP to get past the toll here. Just northeast, you should see a small area with a guy who wants a flourescent Escargotcha shell, a rare drop from the monsters in this area. The reward's only 26 GP, so it's not worth farming for one, but if you do happen to get one, stop by and trade it with him.

Just north of there, you should find Fairmont. Head to the southern area of the town. Go into the house one house right from the westernmost one. Examine the bed and go down the stairs. You can't get to this chest yet, but keep it in mind for later (a lot later). There's nothing much else here, but buy some weapons if you want. They're only sold at daytime, mind – at night, he'll just sell those useless drink items. Definitely get the Rapier, which gives the "Electric Slice" move, and after a few battles, will permanently give you "Thunder Slice", which stuns all enemies, meaning you won't need that Short Sword for paralysing stuff any more.

Now go a little west to find the tower. Talk to the fat guy outside for 10 GP. Talk to the guy at the counter and he'll open the door. Go up the stairs in the next room, then go up the ones in the next. Get the ORANGE MOSS and exit west. Examine the statue, then go back inside. Go down two sets of stairs, and go down through the door that was locked before. Get the 5 GP, then go up the stairs. I don't really know the exact solution to the puzzle here, I just mess around with the switches until it opens. Go up the stairs that appear here. Get the 10 GP and use the save. Go up the stairs.

BOSS: GHOST
Do whatever you usually do for bosses here. If you have any stun moves, stun it to make it even easier.

You get 20 GP and LUCAMA'S AMULET, which doesn't seem to do anything. Go back down to the first room. On the way back, a new chest with a SALTPETER will have appeared. Talk to the guy at the desk for 10 GP Now head back to Wilmington.

Job 8: A little girl's special request
--------------------------------------
To get to Bowman, you'll have to go pay 15 GP at the toll again. From there, go northeast until you can go east, then go east and over the bridge. Bowman's the town in the far east part of this area.

Go into the house in the northeast and go upstairs. Save and then take the northernmost doorway. After some scenes, minigame time. Make sure you save first.

This minigame's REALLY annoying. Try to go fast, but not TOO fast or you'll just get stuck against some rocks and fail. Go slow enough that you can actually control your boat somewhat. If you have plenty of money, don't even bother trying, since winning only affects how much money you get. First place gets you 60 GP, second gets 30, third gets 15, and if you seriously come last, you really suck. And you get nothing.

Strategy by Sage of the Wise:
"For the boat race, just do whatever speed you're comfortable with and stay near the top. After the second waterfall, get to the topmost lane and then just go max speed all the way down, their won't be anything in your way. That should get you first place."

After that's over, head back to Wilmington again.

Job 9: Bandit Troubles
----------------------
Gastonia and Whitaker will tag along for this one. Head back to Edisto. Go into the inn and talk to the blond woman in the left. She'll tell you the bandits went east. That's all you need to do here, but before you go, buy some Flint Spears for Whitaker and Gastonia. Some extra damage always helps, especially since this job's battles are pretty hard. Go on to the world map and go southeast a little, then east quite a long way until you see a town. This is Timmonsville. Go in. Go into the northwesternmost house. After the scene, go downstairs, and walk into the very bottom-left corner for a SILVERSTREET VOUCHER. Examine the pot in this room for 7 GP. Go back up, talk to Fayette, and get out of here.

Go west a little and then south, over the bridge, to Orangeburg. From the entrance, move left, down, left and up. Go into the house and talk to the woman inside. If it's not daytime, go into the inn to change it. Then go and talk to the ferryman by the entrance, then enter Silverstreet.

Go and talk to the guard at the northwest corner. After a conversation, fight and kill him. Head through the door. The enemies here can be really annoying, since they can stun the whole team at once. There's pretty much nothing you can do about that, so just try to kill them quickly.

Get the chests in here for a POTION and 15 GP. Take the easternmost exit, then go south into the next room. From here, go north to Murfree's room.

BOSS: MURFREE
Like all the bosses so far, paralysis works. If you don't have any paralysis moves, have Vance use "Charge slice" and Gastonia/Whitaker attack while Fayette heals.

Aaaand you're done. You get 125 GP for this job. Not bad at all. Head back to Wilmington.

Lumbee Forest
-------------
Okay, now that you're done with those jobs, let's get on with the main story. Lumbee is just northeast of Timmonsville.

Take the southeast exit, then the northeast. Minigame here. Keep in mind that you can jump up the logs as well as across when you're on the second column. Try to jump just after a log moves into position, because jumping when it's already been there for a while is likely to result in the log moving and you falling in.

Once you're over the river, save, and get ready for a boss.

BOSS: PREYING MANTIS
Lol, it's spelt wrong. Anyway, this is another boss that can be stunned, so use any stun move you may have (probably "Thunder Slice")

--------------------------------------------------------------
ACROSS THE DESERT [a2p3]
--------------------------------------------------------------

After the scenes, Gastonia and Whitaker leave. You could head for the desert now, but there's another job to do first.

Job 10: Olar Amulet
-------------------
Talk to Florence to start this job. Livingston's just south of Bowman. And yes, that does mean you're going to have to pay the 15 GP toll again.

Okay, first off, the little group of three trees in the middle of the northern part of town. Examine the spot where a fourth tree looks like it should go for a HARDENED SLIME. Now enter the bar in the northeast. After the scene, go over to the northwest and talk to the woman with the line in front of her. A load more scenes follow, Fayette leaves, and Gastonia and Whitaker rejoin. Save and go up the stairs.

Go into the southeasternmost room and get the DERANCIVIL ESSENCE. Then go through the northeastern room and up the stairs. Go east to save, then up the stairs at the bottom. Whitaker will leave. You'll fight two generic guards, which sould be no problem. Fayette will rejoin for the boss.

BOSS: ROCKWELL
Unlike the other bosses up to this point, he's immune to paralysis, so your stun moves aren't going to be any good here. Still, he's not too much trouble even without it, especially if you got a Flint Spear back in Edisto for Gastonia. Vance should "Charge-up" a few times, then "Charge slice" and then spam his normal attack. Fayette can handle healing, as usual. Gastonia should use "Pincushion" until she runs out of MP, then keep on using normal attacks and maybe healing items if necessary. If she doesn't have the Flint Spear, then obviously, she can just keep using normal attacks, even if they don't do much.

Whitaker will rejoin, and you've only got 5 minutes to get out of here, so save in the library to the east. You won't be using Gastonia and Whitaker for any more battles, so unequip all their stuff. You can sell it later.

Go into the room to the west, and pick up the WINDSOR TOWER KEY. Then go back downstairs and open the northern door with it. Go through the weird room with the plants.

The doors you have to go into correspond with the plants in the earlier room. First, go into the middle door. Then go into the door just right of the middle door three times. Then go into the far left door. Go down a few screens and you're out. Watch the scenes. Gastonia and Whitaker will leave, permanently this time. You'll get the OLAR AMULET, but you won't get your GP reward for quite a while yet. So that's that job pretty much over.

Windsor
-------
There's nothing particularly interesting here. Go all the way to Orangeburg, where you did the bandit job.

Orangeburg
----------
Go into the general store. They're selling stuff now. Buy two Canteens and equip them on Vance and Fayette. Buy around 40 Badin of water. Then buy any equipment you want. Feel free to spend all your money, since you'll lose it all soon. After you finish shopping, there is one little sidequest to do...but not only is it hard as heck, but it only gives you GP as a reward, and you're about to lose all of that anyway. I don't recommend it. If you do want to do it, go to the far west of town and into the building in the south section. It seems to be completely luck-based to me, I had to hack saves in so that I could do it. The best strategy I could figure out was to hit them from the side or behind and then run away really quick, but even that didn't work half the time. The second match is against two people, which REALLY sucks. The third is cake if you managed the second. Once you're done with everything, get out of here.

Strategy by Sage of the Wise:
"Ok, the fighting pit is really easy once you understand the coding and how rpgmaker works. Pretty much you score when you are next to them and hit the enter key, and they score when they move into the square your in. Except, due to how rpgmaker works, if you hit enter while facing them, that also triggers their hit code, so they still get a score. So the key is to know its perfectly ok for them to just be next to you, and to never face them while attacking. After that you just need to know their movement patterns:
Rowland - walk towards, walk towards, wait, walk away
Morven - walk towads, wait
Kenly - walk towards, walk towards, walk away
Anderson - walk towards, walk towards, walk towards, wait
Just set yourself up so when by the time they get next to you they're next movement is either wait or walk away, and hit enter when they get there, just dont face them. The first 2 battles are a joke with this strategy. With the third, run around in a corner while Anderson summons all the fire so its all in about the same spot. When that's done continue as normal. Its a little harder since hes so fast but its not that bad."

World Map
---------
From Orangeburg, go south. When you see a little gap in the mountains, go into it, and get 12 GP from the secret area. Then exit that area and go west and enter the next gap in the mountains.

Pittsboro Desert
----------------
First, go east. Examine the ledge with the chest on. Vance will use Fayette to jump up to it and get the code 2744. Then go west two screens and south one. Head south here and examine the chest. Enter the code 2744 for a SHOVEL. Go back north, and take the eastern exit. Examine the rock. After the scene, equip anything you want to keep. You're about to lose all your items except your equipment. Now head east.

BOSS: BENSON AND MAULDIN
This is just a plot-based battle. Do whatever you want and let all the dialogue play out. Eventually, Benson will knock you out.

You'll now lose all your items and GP. This is why I instructed you not to pick up certain chests – you would've lost the items you got from them here, and you can't get them again unless you take a certain path later on. And you definitely want the freedom to go whichever way you want, right?

Anyway, we're now in control of North.

Pirate's Lair
-------------
Watch the scene. Holly will join. She's pretty much useless, but oh well. North's got no weapon at the moment, which isn't good. Head east and pick up the TONIC and SLINGSHOT. Put the slingshot on North. It's a pretty weak weapon and it uses MP when you attack with it, but it's certainly better than nothing. The tonic's very welcome, too, since you've lost all your healing items.

The pirates here can hurt Holly a lot, but they probably will barely scratch North. Holly will likely die on your way through here – don't worry about it, as North can take care of the battles by himself. Until she dies, she can use those shivs you randomly acquired to try and one-hit-kill the pirates. Even when you run out of MP, the slingshot still works.

Go all the way south, then east. Examine the notice on the wall. After a few scenes, you're back with Vance again.

Pittsboro Desert
----------------
Fayette's gone, but you now have a new character, Anderson. His axe often stuns enemies, and his power and durability are great. In short, he's awesome. He also gives you some much-needed items and GP.

Go west two screens. Take the southeast path. Go east one screen. Keep examining the water for Badin until it runs out, then go back to where Anderson joined. Go east three screens.

Pittsboro
---------
First, go into the southwest house. Examine the five pots you can reach for a total of 10 BADIN OF WATER. Then go upstairs and examine the two pots here. One has 2 BADIN OF WATER, the other's empty. There's not much else here at the moment, but the shop sells some nice equipment. I doubt you can afford any of it at the moment, though. Exit east.

Pittsboro Desert
----------------
Okay, see the wall just south of you? Examine the top-right space of it for a HENTAI MAGAZINE. Then go back west to Pittsboro.

Pittsboro
---------
Go back into the southwest house and upstairs. Talk to the kid and give him the magazine for 10 GP. Now then, back to the desert.

Pittsboro Desert
----------------
Go east one screen, then south one. Talk to the woman twice. Go back to where you fought Benson and Mauldin, and pick up the rope Anderson used to rescue you. Then go back to the woman and give her the rope for 55 GP and 40 BADIN OF WATER.

Now go back to the town, and into the desert again. Go two screens east. Take the northeast exit and talk to the man for 50 BADIN OF WATER (or 30 on hard). Now go back to the previous screen and go east to another spring. Take all the water you can from it. Now go back again and take the south exit. Enter the building here.

Kanna's Shrine
--------------
Go down the stairs. Go into the northeastern door. Push the statue upwards, then go left. Press Enter next to the rocks when they're in line with the door. Now go back east. Push the statue east, then exit south. Go back north, and push the statue north. Go east.

From the start, go 2 right, 1 down, 3 right. Wait for the layout to change. Then go 1 up, 1 left, 2 up, 2 right. Wait for the layout to change three times. 1 down, 2 right, 1 down, 1 right. Wait for the layout to change twice. Go 2 right, 1 up, 1 right. Wait for the layout to change twice. Go 3 right. Wait for the layout to change once. Go 1 right, 1 down, 2 right.

Press the switch in here, then go back left. Just step wherever and let yourself fall, it's quicker that way. While you're down here, get the HI-TONIC if you haven't already. When you get back up, go into the northeastern door. Push the statue north, then go west. Go back east and push the statue east. Then take the north door. Go up and...

BOSS: GARGOYLE x 2
Just spam normal attacks and use healing items when you need to, as usual.

Now go back south. Go up the stairs, and through the door.

BOSS: BENSON AND MAULDIN
Like last time, this is a plot-based battle. Do whatever you want.

After a lot of scenes...

Pittsboro
---------
If you want, you can go and do another job now. If you want to, go do it before you get Fayette's cure from the medicine shop, or you won't be able to any more. It's worth doing, since it's easy and you get some money and a Rare Essence, which is really useful. To do it, head all the way back to Wilmington and talk to Florence. If you don't want to, skip the next paragraph. When talking to Florence, you'll be given an option to sell your Olar Amulet for 80 GP if you did job 10. Don't do it – you'll get 110 GP instead if you wait for later. Sell it now if you really need money right now for whatever reason, though.

Job 11: Missing Trophy
----------------------
Go to Bowman. If you did job 8, you should know where it is. Dalzell's house is the southeasternmost one in town. Talk to her. Now go on to the little grassy space outside the forest area, on the far west of the island Bowman's on. Go into the house and examine the sink in the top-right. Kill the ninja – he shouldn't be any trouble. Then head back to Dalzell for 50 GP. Now...go all the way back to Pittsboro.

Pittsboro
---------
Go to the medicine shop and buy the cure for 70 GP. Go back to the inn. After a lot of scenes, Fayette rejoins and Kanna joins too. Kanna basically can't do anything whatsoever without magic items made with the menu prism using various ingredients. Since you just lost all your items, you probably won't be able to make anything right now. She does come with a few spells already made, so use those until you run out if you like, or save them if you prefer.

Exit the town east.

Pittsboro Desert
----------------
Go east and over the bridge, then north to the casino. Talk to the guy outside for 25 GP. Then go in. You can play craps, poker, and blackjack here. You can keep going until you win a total of 220 GP, if you like. Once you're done with that, go back to the desert and keep going south until you get out of the desert into another area (with cool music). Just after you cross the bridge, go all the way left to get some ASH. Then exit south. There are a few little areas around here, but there's nothing important in any of them, so head east to Durham City.

Durham City
-----------
Anderson leaves when you enter here, but don't worry, he'll be back. The weapon shop here isn't selling anything right now, so there's no new equipment to buy.

From the entrance, go up past the first row of houses, then go into the house two houses east from your position. From the space just east of the pale blue-haired girl, move down two spaces, face left and press enter. You get a GOTHIC CAPE. Now leave this house.

Now go to the row of houses just above the row you're at now. The second house from the left has an entrance at the back. Go in and examine the bookcase for a SONGBOOK, which teaches Kanna a sleep spell.

That's all there is to do here, so go up north to the castle.

Durham Castle
-------------
From the entrance room, go north. Go east from there and up the stairs in the library. From there, go west. Talk to the guards at the bottom, then go west again. Watch the scene here, and Kanna will leave. You have two choices here...you can go to the restaurant for food, or have the palace food. It doesn't affect anything, so do whichever you want.

For the palace food – From the room right after the entrance room, go west, and talk to the chef. Watch the scenes.

For the restaurant – Go back to town. The restaurant's the first house from the left on the second row of houses from the top. Go in, watch the scene, and you'll lose all your money. Then go into the bottom-left house. Arrange the flowers so that the red one's in the middle and the blue ones are surrounding it. One of the blue ones is obscured by the ceiling, so watch out for that. Just keep running around the obscured area just south of the door and pressing Enter until you get it out. Once they're in the right position enter the door, and get your money back.

Durham City
-----------
After you get food (whichever way), go into the southeasternmost house in town. Talk to the woman at the counter. Pick whatever you want, since the Gothic Cape you got before will let you into the ball whatever you get. Dark Knight Armor gives the funniest responses.

Durham Castle
-------------
Go east to the library and up to the stairs. Talk to RPG Advocate, who's guarding the stairs. If you have the gothic cape, he'll let you past. Go upstairs and then west into the ballroom. Walk around and talk to everyone until Fayette and Salem show up. Talk to Salem. After the scene, head back to the waiting room. A load of scenes follow, and act two is over.
User avatar
loof123
PhysicMage of Arkadya
 
Posts: 5803
Joined: Tue Sep 22, 2009 7:55 pm

Re: Three The Hard Way

Postby loof123 » Wed Aug 11, 2010 6:43 pm

WALKTHROUGH - ACT THREE[wk3]


-------------------------------------------------------------
The Thought Realm[a3p1]

-------------------------------------------------------------

Durham Valley Inn
-----------------
Once your done absorbing the massive amount of plot that has just been shoved in your face you'll see that you're now in control of Kanna, and she insists on being just as enigmatic as usual even when your playing as her. So do as she says and start your journey to the Kershaw Lighthouse.

World Map
------------
Head to the southern part of the continent and you'll soon enter Kershaw Pass, and just as quickly you'll be exiting Kershaw Pass, after a brief moment of plot. Back on the world map there's a few places to visit before we move on with saving the world. You can see A town slightly to the west, that's Kershaw itself, which we will be visiting in just a moment, but first go farther west then that and head behind a small patch of mountains to find a secret area. Inside is a cheat with an AMETHYST RING. Now head back and enter Kershaw.

Kershaw Township
----------------
The town has got all the normal stuff your used to; inn, merchants, etc. so go check that out as you see fit. There's also some treasures here to pick up. The well has 2 BADIN for you, and one of the trees in the southwest has an APPLE.(Note: due to a bug you won't actually get an apple unless you fix the code) There are two barrels next to the red house in the northwest, the lower of the two has 2 ASH, or 1 in hard mode. Inside that house is a chest with EYE OF NEWT.

World Map
---------
That's pretty much all there is here for now, so when your done leave and head east towards the mountains. There's one patch of land that looks different then the rest. Go there and enter Kershaw Heights.

Kershaw Heights
---------------
On the first screen when you enter head to the left most part of the treeline and examine it for an ACORN. In the next area there's a chest slightly hidden on the left with a TOADSTOOL. From here you can either try and fail to head right or continue up. In the next area there's a save spot and a cave, so go in there. Very soon into the cave you'll trigger some more cut scenes, and Tatum will join your party. Immediately turn around and head back to Tatum's room. Open the chest there for 38GP, or 22GP in hard mode. Now continue up through the cave and very soon you'll be switched back to Vance.

Thought Realm
-------------
After a few more scenes you'll find yourself outside a house, so head into it. Talk to the man standing behind the counter, and after a short conversation do what he says and take a seat at the table. The shop owner will enter and then will begin the mother of all exposition. Once the conversation is over with, leave the house and head south to the forest. This is a good time to point out that if you ever need to you can come back to the house and sleep in one of the beds for a free heal. Also, D'nalsi will sell Hi-Tonics and Antidotes. You can also head east of the house to find a graveyard, but there's nothing to do here at the moment.

Dream Forest
------------
Head south across the bridge and passed the intersection and you'll see a chest partially hidden which holds a METEORITE PIECE. Then head left back at the intersection to what seems to be a dead end. At the part of the ground that's darker then then the rest you can head down. Follow the path until you come out on a ledge. From here you can enter a small grove by following the treeline right at the ledge, but there's nothing there now. So head down the ledge and enter the cave.

Go through the cave until you reach a cut scene where Manteo will help you with a puzzle involving memorizing an increasing series of directions. In easy mode there will be 5 rounds, and in hard mode there will be 8. Alternatively you can give Manteo all your money to do the puzzle for you, but I wouldn't recommend it. Some people have trouble with this puzzle, the trick is not to start inputting directions the second Manteo says one, but after the direction disappears and you hear a sound. Once you hear the sound its okay to start inputting directions.

After completing the puzzle continue through the door that appeared. You will soon see a chest on your right, but its impossible to get. (if you do manage to get it, it would lower all your characters stats by 50, have you save, then call you a cheater.) You'll soon leave the cave and be back in the forest. Climb up the ledges and enter next area. You'll be in the area you saw the clown earlier. There's a save spot here, then continue north and more cut scenes will ensue. After its done you'll be back in control of Kanna.

Kershaw Heights
---------------
Back in the caves, continue up to the exit. There will be a save point outside. In the next screen you should see two small bushes on the ground, each one has a JALAPENO PEPPER in it. At the next screen you will finally be at the lighthouse. To the right of it is a chest with a MYSTIC RESIN in it.

Kershaw Lighthouse
------------------
The first floor is just a small empty room, head up the stairs.

The second floor has an invisible maze. From the sign go down 3 intersections, right 1, and up 1 to reach a chest with 20GP. From there go 1 down, 2 left, 1 up, 1 left, and 1 up to reach another chest with a COCONUT. From there go 2 down, 1 left, 2 up, 1 left, and 1 down. From here you can easily reach the save spot and the stairs.

Now you will be at the top of the lighthouse, and so will Benson and Mauldin. More cut scenes happen, and once its all over, you'll now be in control of North.

Branchville Crater
------------------
Right in front of you is a save spot, use it if you want and continue up. As you can see Branchville has been completely wiped off the map and North's house was ground zero for the explosion. Luckily though Clifton survived and he'll join your party at the end of the cut scene. Clifton has a Phoenix Charm, which is a rare accessory you may want to remove from him and give to North, especially since he may or may not become part of your permanent party.

World Map
---------
We're back in the Burlington Duchy, haven't had a chance to explore here since act 1. Anyway, head west towards where the sheep farmer and Cumberland is, and you should see a new place that wasn't there before, this is the Kita Shrine, go head in.

Kita Shrine
-----------
Outside you'll see Alex, and if you managed to hang on to the Alex Vest, you can now give it to him for a RUNE TABLET FRAGMENT. I should point out that at this point its okay to get the ruin tablet fragments without worrying about them being stolen and never seen again.

Head inside and there will be a cut scene. Then you will have to do a kind of stupid puzzle. The easiest way o do it is to set up two red crystals vertically like a gate, and then just move all the blue crystals through the gate one at a time until they are all gone. After this is over Lowry's will tell North to meet him at the top of the mountain, Before you do this head back into the house. Inside is a chest with a ROPE, and if you talk to Cordova she will give you 2 TONICS and a SLINGSHOT if you don't already have one. After your done head out the back of the house and across the water you'll see a second chest with another ROPE. Grab this then head towards the mountain.

Use the rope you just got to climb up the cliff you come to. Then head up and enter the cave behind the tree. Follow the path and you'll exit the cave shortly. You should see a spot by the cliff for another rope, but don't use one there yet. Instead head down from that spot and you'll enter another cave. Go down the path until you exit the cave. Outside you'll find a chest with another ROPE. Use the rope to descend the cliff and get a fourth ROPE and hit the switch at the base of the tree. Now head back through the cave to the cliff with the rope spot from before. Use the rope here to climb up and you be attacked.

BOSS: Eeluminati
Not much strategy for this one, just use your skills, heal when necessary and it should go down pretty fast.

After that you'll see a save spot and a shrine up ahead. Before you use your last rope to head up there, go check out the pillar to the right of it that should be there if you hit the switch earlier. North will find another switch here. Now Head back down to the long vertical cave. About half way down this path if you look closely at the left wall you'll see a part that doesn't cast a shadow on the ground. Walk up to it to enter a room, and if you checked the pillar there should be nothing blocking the stairs there. You'll be outside again with three chests which contain 2 IRON HANDS and a HI-TONIC. Make sure to equip both Iron Hands to North.

Once that is done you can finally go to the shrine at the top of the mountain. After the scene here North will have some new skills as well as another reason to angst about life. Norths skills depend on what weapon he has equipped and what his health percentage is at. Head back down the mountain and when you reach the house at the bottom there will be another cut scene. After its over head back to the world map.

World Map
---------
So now you need to find where Orrum ran off to. If you didn't go loot Selma Castle back in act 1 you can now, and if you left the RUNE TABLET FRAGMENT there for later now would be a good time to go get it. When your done with that head to Somerset.

Somerset
--------
When you get here go head towards Vance's house and you'll see North's sister outside it. Talk to her and you'll find out that Orrum regularly has dealings with North's parents. So go head over to North's house to find that no ones home. Clifton will point out a secret basement, so head down. Another cut scene occurs in which North goes for an angst hat-trick. When thats over and done with you'll be in a graveyard. Talk to the people around you if you want, then talk to Clifton to leave. North and Clifton will head off for Dillon, and the game switches back to Vance.

Durham Valley Inn
-----------------
After another cut scene head back up to Durham City.

Durham City
-----------
The weapon shop in town is now open. Its definitly worth checking out because you can get a Scimitar for Vance which will teach him the teach him the incredibly powerful Red Crescent after having it equiped for 4 battles. After your done there head to Durham Castle.

Durham Castle
-------------
You'll be taken to the conference room to talk to Duke Salem. He'll hire you to go get Fayette back from Duke Greene, and he'll pay you 200GP for the job, or 135 GP in hard mode. You will also have the option to turn in Tatum for a bounty. I'm not sure on all of the consequences of this decision yet, when I do I'll change this part. But if you do turn her in you get 65GP and in either case she does not come with you to Dillon.


-------------------------------------------------------------
Hunting Down Duke Greene [a3p2]

-------------------------------------------------------------

Campobello
----------
After the surprisingly uneventful ship ride you'll arrive at the port town of Campobello. There's a few things to grab here as well as a side quest if your interested, and if your still playing I assume you are. First off the merchants here sell all types of new weapons and armor you can blow your money on. The item shop here has tonics, hi-tonics, carotenoil, and awakenings. Now, go under the bridge in town and stand directly in the middle of it, and then walk right. You will find a RUNE TABLET FRAGMENT. Then walk a step away then walk back to it again. This time you'll find 2 HARDENED SLIMES, 2 ORANGE MOSS, 2 BONES, and an ORANGE CLAY. There's a similar area to this towards the north of town. If you walk behind the wall that's behind the stairs, you'll enter a secret area with a chest that contains an EBONY BUCKLER. Now head back toward the port and enter the east most house next to the Inn. There's a chest on the right hidden behind a bush that holds a POTION. On the top level of the town, head into the item shop. Theres a bag on the left, check it for NECTAR. in the house next to the item shop, examine the clock for QUARTZ. Now if your up for it you can do a small sidequest for some money and items.

Sidequest: Find Latta
---------------------
Go to the house in the northwestern most section of town, talk to the women to learn that her daughter has disappeared. Then wait until night. Go underneath the bridge like before, expect this time go left until you enter a new area.

You'll find yourself in a secret underground bar. Go talk to the bartender to learn more about Latta. Then leave the bar to the south to enter the catacombs. Head down until you reach an intersection. You'll see a chest there with WINGED BOOTS. Head to the left for another chest with a RUNE TABLET FRAGMENT. Head back to the right passage and you'll soon find Latta. Talk to her and then the bagmen offer to sell her for 5GP. You can either pay them or fight them. If you fight them you'll be able to get 35GP in a bit so I suggest that. If Vance has learned Red Cresent it will kill them all. After the results of your decision play out, you'll be back at Latta's house and her mom will pay you 10GP. If you fought the bagmen, head over to the Baron's house and you can extort him for 35GP.

World Map
---------
After your done in town, leave and cross the bridge, Dillon is north, but there's a few things to the south we can do first. Directly west of the bridge, there's a mountain sticking out of the mountain range, enter it and you'll find yourself in a Penal Colony. You will see a chest here guarded by two soldiers. If you wait until night you can get the chest, inside is a RUNE TABLET FRAGMENT.

Back on the world map head south to the lower part of the continent. Head east to a small patch of forest and you'll find another small area. Check the left statue for a HEALTH ESSENCE. There is also a chest behind the treeline that holds a PHOENIX CHARM. From here head west until you reach Bragg.

Bragg
-----
Outside the fortress there's 5 BADIN in the well. Once you enter, on the outer left path there is a tray of food with a TOADSTOOL on it.Then head to the upper right corner and examine the tree for ORANGE CLAY. In the lower level of the fortress is an inn and a guy who will make potions and awakenings. Marion is also down there.

The upper level has a large library. I'd suggest reading all the books there, they contain a lot about the history of the world that isn't really talked about the rest of the game. On the right side of the second row of books, 3 books down is a BOOK OF HEALING. On the right side of the third row of books, 6 books down, is a book that will teach Anderson the Tiger's Claw stance. In the back row of books, second book on the left is the GRIMORUM MINIMA, a weapon for Kanna. When your done reading talk to Pelion at the top of the area for a cut scene. After that your done here so leave whenever you want.

World Map
---------
From Bragg start heading back north past Campobello until you come to another port town on the east cost called Colerain.

Colerain
--------
There's another weapons shop here, as well as an item shop with tonics, hi-tonics, revives, and mahou spices. There's a chest on the west side of town that you can't get, so don't try. At night the house to the right of the inn is open and there's a few things of interest there. In the first room is a bar and if you talk to the owner you can extort him for 10GP. In the back room you'll meet Myrtle who will invite you to play 3-card Monte. Whether you play or not is up to you, the game is inherently rigged to the dealers advantage, but if your lucky you could make some money. She stops playing if you get 5 games up on her.

From here on out you have three different paths to take to Dillon. You can either go through Arcadia to the west, go through Colerain Mountain, or take the Ferry from Colerain to Dillon. The choice greatly effects the rest of the plot arc as well as the rest of the game. I'll go more in detail about it when i update this.


At this point you need to get to Dillon, and there are three ways to go about this. You can go through Colerain Mountain, Go through Arcadia on the western part of the continent, or take the ferry from Colerain to Dillon. Colerain Mountain is the fastest route to Dillon, but probably the least rewarding. You'll arrive in Dillon without any new additions to the party and there aren't any exclusive items either. If you take the path through Arcadia you'l get the items that Benson and Mauldin stole from you way back when in the desert as well as have North, Clifton, and Fayette in your party by the time you reach Dillon. If you take the Ferry you'll get a new party member, Roper. You only get her in this path and Clifton won't join your final party. After the story arc is over the paths mostly merge back into one but there are many dialouge changes and other small difference throughout the rest of the game based on what path you chose that'll be detailed as we get to them.

Also, for those interested in getting every little thing they can, Colerain mountain can be completely looted with out ever taking that path by doing it in two parts. First go there and do everything up to the boss, then head back. Later when you've arrived at Dillon through another path, head back to the mountains and grab the stuff on the other side of the mountain. Anyway, scroll down to the path you chose and start reading.


**********************
Colerain Mountain Path
**********************

World Map
---------
From Colerain, the mountain is pretty much right in front of you, so head in.

Colerain Mountain
-----------------
Ah, the mountains. Crisp air, great view, Bob Marley playing on the wind. Anyway, head up the first short stairway here and then take a left across the bridge. On the other side head up the ladder and you'll find three tunnels and two trees. Each tree has an ACORN, so grab those then head into the right tunnel. Inside the mountain, head down to the next area, then go across the bridge and head down again until you back outside of the mountain again. There will be a button here so go ahead and press it, then head back to the other side of the mountain.

This time take the middle tunnel. There cave has been recently populated with bridges thanks to the button, but before you cross them turn right just before the first bridge to find a chest with a DERRANCIVAL ESSENCE. After that cross the bridge, and then another too the right, and head down to the next area. You'll be back outside facing suspicious looking log. Upon further investigation you'll find a switch in the log, flip it and head back to the other side of the mountain again.

Now enter through the left entrance. Now you'll be on the lower level of the cave. Head down the path until you pop back out on the other side of the mountain again, this time on the ledge with the chest you've no doubt been wanting for some time. Open it for a LONG SWORD. Once again head back to the otherside of the mountain.

This time its back down the right tunnel. Head down to the second area but before crossing the bridge look for a differently colored part of the ground along the southern wall, walk up to that to enter a new area. Now if you messed with the log earlier there won't be any rocks jutting out of the ground to block your path here, so just continue down the path and you'll be outside the mountain again by a save spot, and then its back into the mountain again, where you'll soon pop back out the other side. When you head down the stairs here there will be a boss battle.

BOSS: Craven & 2 Blitzwings
Now, your first thought it probably to use Red Crescent if you have it to end this quickly, unfortunately Craven will resist the attack. The 2 Blitzwings will still be killed off so if that's worth it for you then go ahead. If you choose not to go that route you should use some hit-all attacks to either kill the blitzwings or at least get them near death so they can quickly be killed after, not that they should last much more than two attacks anyway. If you have spells for Kanna the enemies are weak to earth so the Faison spells will do the best. Just keep wailing on them as usual and it'll be over soon.

Once you've won, flip the nearby switch and then head all the way back to the beginning of the mountain. When you get there this time head up the big ladder instead of going across the bridge and after awhile you'll reach the top. Now luckily that switch we just hit removed a bunch of boulders here so you can continue down to the other side.

When you get off the ladder you'll see a tree in front of you. Check it out for a ACORN. Then head across the bridge and down the ladder to a small wooden landing at the bottom. right before leaving the area check the spot to your right and you'll get an ELECTRIC EEL. Now you can leave. You'll find yourself in a forest and a cut scene will start. When its over leave the forest and you'll finally be out of this mountain.

World Map
---------
From here you can see a bridge on the right passed some mountains, head across there and straight towards Dillon. That's the end of this path so scroll down until you see the section for Dillon.


******************
Severn Island Path
******************

Colerain
--------
Head to the shop at the bottom of town and talk to the guy on the left. Its going to cost 20GP for all of you to get a ride to Dillon. Once you've payed the man, exit the building. A cut scene later you will be on the ferry.

Ferry
-----
On the ferry you'll have a chance to walk around and have some in depth conversations with Kanna and Anderson. Kanna is above deck right where you start off. Anderson is below deck in the left area. You can talk to both of them twice for more conversation. The right area below deck has a save spot and Myrtle, the 3-Card Monte lady from Colerain. Talk to her and then go back above deck and talk to her again. There will be a cut scene and when its over you'll be on Severn Island.

Severn
------
To start off you'll be in Castilia's house. In the bottom left corner is a chest with a TONIC in it. Head downstairs for another scene. After that leave the house. Your next goal is to go see Myrtle, but there's a few things to do in town first. Outside there's a well with 4 BADIN. Head left now. Over here they've got an inn and weapon's shop for your use. Enter the house to the right of the inn and head upstairs. There are two drawers here in the top left corner, each one has 4GP. Back outside enter the house below the inn. The fireplace here has ASH. Once your done checking out town enter the house right behind the pond. In the back room you'll find Myrtle and Roper. You'll be hired to check out the forest and find the witch Hazel. Head south out of town and in the next area go right to enter the forest.

Severn Forest
-------------
In the first area, immediately look along the southern treeline for a darker patch of ground near the center of the area. Head there for a secret area with a chest containing a PIXIE BRACELET. Head back to the main path and continue right. Just continue through the forest for a bit, the path is fairly linear. After crossing over a stream via log, just walk passed the tree below you on the right side to continue on. In the next area you'll probably notice a semi-hidden passage south, ignore that for now and continue right.

In the next area you'll meet some pixies that want you to race their fish. You can attempt the race, but you're going to lose, the fish is just much faster than you. After loosing go back to that semi-secret passage mentioned earlier and you'll soon be in a cave with a rock. Drop it in the river to sabotage the fish and try the race again. This time you'll win. Enter the newly opened cave. The cave is completely linear, and you'll be back in the forest soon. You'll come to a intersection with a save point. The right leads to a chest with 12GP, and the bottom path leads deeper into the forest. In the next are you'll finally find the witch Hazel. A long cut scene will ensue and when its all over and done with you'll be back outside town.

Severn
------
Head back into town to go check on Castilia. There will be more plot, and you'll have to head down to the festival. But before you get there it will start raining and another cut scene will happen. When that's all over Roper will have joined your party and you'll need to head back to the forest.

Severn Forest
-------------
Everything's the same as before except now its raining and you have a partner, head back through the forest until you get back to the area with the fairies. You'll soon notice a parts flooded. When you try to get through the fairy will challenge you to a game of tug-of-war to get by. To win you just need to rapidly hit the enter key. Once that's done keep going through the forest until you find Hazel again. This will trigger a big plot filled series of scenes. When its finally all over and done with you will be reunited with Kanna and Anderson and you'll be in Dillon Harbor. Head up a screen and you'll be in Dillon. That's the end of this path so scroll down until you see the section for Dillon.

************
Arcadia Path
************

World Map
---------
From Colerain head west around the lake and then north into a mountain path, you'll soon find yourself in Arcadia Checkpoint.

Arcadia Checkpoint
------------------
Talk to one of the guards blocking the way to start a cut scene. You'll learn to get passed the checkpoint your either going to have to Dunn them 100GP or 50GP and a night with Kanna. What this effectively comes down to is 100GP for unlimited access to the checkpoint, or 50GP for one way, so just choose whatever you want. The 50GP route leads to a rather funny scene though so its definitely worth trying even if your not going to save. Anyway, one way or another you'll pass through the checkpoint.

World Map
---------
From here theres three areas you can access. If you go west you'll quickly hit the Estill Checkpoint (Dillon really loves their checkpoints dont they?), which you won't be able to bribe your way through. There's a cave to the north, but two guards block the path. That just leaves the town to the east, so head there.

Lower Arcadia
-------------
Before you do anything else, head to the inn. Vance will reunite with North, and both him and Clifton will join your party. Huzzah! You'll also recieve 40GP from them, or 25GP in hard mode. Anyway, once those cut scenes are over feel free to raid the various shops for whatever you need. In the item shop check the bottom right pot for CAROTENOIL. At this point if you payed Dunn 100GP and you haven't gone to Bragg you can see some slightly different scenes with North and Clifton.

Arcadia Cave
------------
This place is pretty much a giant switch puzzle, so lets get this over with. In the first are there's not much to do, just follow the path into the next area. Heres where the fun begins. Climb the one ladder available to you and enter the hole. You'll be in a room with two switches. You'll be going to alot of these rooms in this cave, and to make things easier, I'll refer to a switch pointing to the left as off and one pointing to the right as on. So, turn the right switch on and exit back to the main chamber. You should be able to climb two more ladders to the very top of the chamber. Enter the hole here to be back at the first room. Follow the path here to hit the switch and then head back.

Back in the main chamber, head down the ladder, then on the next platform go down the left ladder. Head down the hole here to be in the first room again. Follow the path all the way to the end to hit another switch, then head back to the chamber. Head back up the ladder and enter the hole here. You'll be in another switch room, turn both switches on and leave. Go down the left ladder here, and then the left ladder again and enter the hole. You'll be in another switch room, this time with a chest. Open it for a STAR EMBLEM, then turn on both switches here. Head up two ladders and enter the hole here. Turn on both switches and a chest with a ROPE will appear. Head back down two ladders to the switch room with the first chest and turn both switches back off. Now go up the right ladder and down the hole and arrive back at the second level of the first area. Head back to where you flipped the switch and there will be a small bush by the cliff, you can put the rope there to go down. Head left from there to find a chest with a BRASS KEY. Now head all the way back to the first chest room in the main chamber.

Turn both the switches back on here and exit the room. Go up the left ladder and then back down the next left ladder and enter the hole. You'll finally be out of that room. Follow the path up a bit and check the keyhole in the wall to use the key you found. This will get rid of the blockage to your left letting you exit the cave.

World Map
---------
Right in front of you will be Duke Greene's villa, but ignore that for the moment. Go around it, and east past the cave, which will be useless to you for the moment. Keep walking east towards the mountains to find a hidden area. There's a house here with a man who sells hi-tonics, revives, carotenoil, and awakenings. Outside the house head towards the patch of dirt on the right side by the trees, you'll enter a new screen with a chest containing a RARE ESSENCE. When you're done here exit and head to the Villa.

Duke Greene's Villa
-------------------
You won't be inside the Villa yet but across the river from it. In front of you will be four squares in the shape of a cross and four boxes spread out around the area. To solve this puzzle you need to move all the boxes so the E symbol on it points to the center.Theres a trick to the box by the river. You need to push it behind the trees to the left first so you can get above it and push down away from the river. When you complete it a bridge will appear, cross it and continue on.

Outside the Villa, there will be two entrances take the left one first. Inside there will be a patch of flowers you can move around but you can't do anything with that right now. There's a switch behind the right set of statues so walk behind it and you should hear a click. Once You've done that leave this room and take the right entrance to the Villa. On the right there will be a loom, examine it to unlock the door, then proceed through it. In the next room you will see a chest. If you hit the switch in the left room, it will be open and you can enter it into the basement. Here just head forward up the hall until you climb the stairs. You'll now be in the foyer.

First check the barrel straight to your right for a JALAPENO PEPPER. Now head down two screens and then to the bottom right through the door. You'll be back in the left entrance room and the flowers will have been pushed in the correct position, spawning a chest with the SKELETON KEY. Head back up to the foyer. Go to the left past the table and chairs and into another room. There's a bucket here that will fully heal you once if you need it.

Head back out again. Above the table there is a sign on the wall that gives a clue to the puzzle in the villa. At least in hard mode it matters, otherwise its not very important. There are four statues in the foyer, two on the left side, two on the right. Normally you just need to hit the switch on all of them to get everything. In hard mode its a little different. In either case you should start by turning them all on. The first one is just to your right. Then head back to the middle section of the foyer, head left at the brown colored tile and then up the stairs. One of the statues is up and the other is down. Activating both left statues will spawn a chest in the back of the foyer, but its locked right now. Go back down the stairs and across the hall to the right set. After going up the stairs head down and activate the last statue.

You can now go back to where you entered the Foyer. In the left corner you can open the chest now for a HI-TONIC and REVIVE. Back in the right staircase you have a important decision to make. In the room on the right you can have your final showdown with Benson and Mauldin. If you fight them you'll get all the gold you lost in the desert plus 16GP, any rune tablets they took, Lucama's amulet, and Marion's Staff if they were stolen. If you do this they'll be dead and obviously won't show up anymore, and you wont get the Grimorum Anathema from them later. Anyway, if you decide to fight them.

Boss Battle: Benson & Mauldin
First Off, Red Crescent isn't going to work in this battle. If you try to use it when Benson is still alive he will counter with Reverse Red Crescent which will deal 100 damage to everyone in your party and reduce his HP to 1. So unless you see that as a viable strategy to lower his HP, don't do that. Benson also knows Hiryuu Shouri Zan, which will one hit kill anyone it hits, and he can heal himself. In hard mode he knows the desperation technique Hiryuu Seizon Kougek which is a massive hit all attack. Mauldin is less of a threat. He Can lower your attack or put you to sleep, and has a desperation technique that will make everyone stumble. The main threat is Benson's one hit kill move, so work on taking him out first, once hes gone Mauldin won't last long. They will drop BENSON'S SWORD and MAULDIN'S STAFF.

Whether you faught them or not, head north from the top of the staircase. There will be a save, then use the skeleton key to enter the next room. You'll confront Duke Greene and Orrum but they will flee. You do succeed in saving Fayette though and she rejoins the party. More plot will occur and you will eventually find yourself outside the Villa. Go back to the world map.

World Map
---------
Head to the cave in the mountains to the north. The path here will be clear now so just follow the path until you get to the other side. Once you're out head into the swampy looking area on the right.

Upper Arcadia
-------------
Anyway, this area is unique in that its a hybrid of a town and a dungeon. You'll see what I mean as you progress. You're going to want to bring Kanna here so make sure she's in the party. When you enter right in front of you will be a house, enter it. There are a few things of note here. First in the top left corner there's a pot containing a GINGER ROOT. Near the right corner of the room there's a girl spinning in circles, talk to her for some HOLUNCA. There is also a man behind a table who will act as the item shop for this town, selling tonic, antidote, and awakening. When your done hear leave the house.

From hear continue east and then north across the bridge. Head to the left across another bridge and enter the house here. Inside you'll find the lady here is running an inn. Also, the three pots in the top right corner each hold NECTAR. Leave the house and head to the right. You'll see a log. If you examine it, it will move to the right, so keep doing that until it moves into the river then cross it. In the next area follow the path back and forth until you reach a cave. Inside the cave follow the path until you see a chest. Open it for the GRIMORUM AVIA. Equip this to Kanna and head back to the first area.

Go back down to near the entrance and you will see a scarecrow. On your left will be a sparkling patch on the ground. Walk onto it then go to the menu and cast levitate. You'll cross to the small island. Talk to the guy here, he'll offer you 20GP for his stuff. If you accept you'll get a RUNE TABLET FRAGMENT and you only actually pay him 10GP. Levitate back to the main path and go slightly south. You'll see another sparkling patch here, levitate here as well. On the other side you'll find a cave with a chest containing a ROPE inside. Levitate back to the main path and go back to the next area. You'll see a small patch of dirt here along the ledge, use the rope here. Climb down and go right to the next area. Here enter the house and walk through it back outside. Keep going right and you'll be back on the World Map.

World Map
---------
Go south a little bit and then east for a bit until you see a bridge. Go south a bit to another bridge that will take you to Dillon.


Dillon
------
We've finally arrived at Dillon, one way or another. But before storming the castle there's a few things to do first. Standard inn/weapon/item shop deal. The item shop makes everything you've seen up to this point. In the south part of town during the day there's a girl selling apples, who Vance decides not to extort money from, but if you come back here later you can. In the eastern most house in the row of houses facing the harbor has been recently relieved of its occupants. If you check the sign on the wall there you will find a REVIVE. Up in the northeastern part of town, you can walk between two of the houses and behind the right house there's a chest with HENAR ESSENCE. Also in the southwest corner of town by the inn during the day is a boy who will tell you where there is treasure in the castle for 14GP. There's really no reason to pay him if your using this guide, unless you want the chance to yell at him later because he tells you the wrong place.

At night in the north east corner enter the door next to the barrels. Inside you will find the 'Famous Dillon Treasure Chest Game'. If Roper is in your party you can extort the place for 55GP, or 40GP in hard mode. Otherwise you can play the game. Its all random and you just gotta get lucky pretty much. If you win 7 games she will close. Once your done with that game there's one more thing to take care of before going after Duke Greene involving a certain doomsday weapon, so head back up to the world map.

World Map
---------
Cross the bridge head up a little bit, then head back east across the new bridge and into the Fairfax Checkpoint

Fairfax Checkpoint
------------------
Here you'll soon come to a guy blocking your way, as it commonly happens at Checkpoints. How you get by depends on what path you took to Dillon. If you took the mountain path, then its going to cost you a third of your GP. If this applies to you I'd suggest making sure you've done all your item buying in Dillon first so you don't give up as much money. If you took the Severn path, then you'll have Roper in your party and get by for free. If you took the Arcadia path then you just have to give him the Holunca you got there. Anyway, once your past him head through back to the world map.

World Map
---------
Immediately to the north west is the town of Fairfax, so head there.

Fairfax
-------
Few things to grab here. Head toward to the northern treeline, three of the trees here give APPLES. Inside the inn there's a chest with a HI-TONIC. Also make sure to talk to big the red shirted guy near the entrance of town, this will cause him to open up a new shop later in the game. Note that hes only around during the day. Come by at night and enter the weapon shop to meet Sharon, this duchy's version of Lauren or Florence. Unfortunately Greene has outlawed bounty hunters so she has no jobs for you at the moment. That's all there is here so head back to the world map.

World Map
---------
Head right and up around the mountains here. There's a small patch of forest on the northern tip of the continent, go there to find an area with a chest containing 30GP, or 20GP in hard mode. And for those of you interested there's a small area on the western tip here. It may serve as a very minor part of the upcoming plot depending on which path you took to Dillon, other than that there's nothing there. After that head into the forest bordering the mountain.

Fairfax Forest
--------------
Ok this place is going to be a mess for me to guide you through, but I will do my best. Now, the goal here is to get enough Knight Insignia's to be allowed past some guards deeper in the forest. How many you need depends on how many people are in your party. If you took the mountain path you only need 3, if you took the Severn path you need 4, and if you took the Arcadia path you need all 6. You can get them by killing the Knights that wander the forest. Each of them drops 20GP so its a good idea to kill as many as you can. Also worth noting that some of the chests in this are are bugged, and depending on what order you open them in, some may be open when you get there, and some will always have an item in them. The only way to fix this is to fix the code.

Anyway, first head to the left and then down at the first intersection and left at the second one. There is a knight across the river here, you can only get to him if you got the Grimorum Avia in the Arcadia path. If you didn't take that path you won't need to kill him anyway. In either case follow the river down a bit and you'll find a chest with 25GP in it. Now head back toward the entrance of the forest. From here head as far right as possible then down. At the first intersection go left and you'll find the next knight. Head back to the previous path and continue down. The next intersection is actually one big circle, and a knight patrols the circle. So either hunt it down or wait for it to circle around again. After killing him, keep following the right edge of the map down into a new area. Here there's a fourth knight and a chest with POTION in it. Now head back up into the main area and go left at the first intersection, and the lower path at the next one and you'll find another knight. Now go back and take the upper path and at the next intersection the lower one for a chest with a NEUTRALIZE RING. Now head back to the main path and then west across the log and continue into a new area. Here you will find a RUNE TABLET FRAGMENT. If you are in hard mode there will be a switch here you'll need to press.

Back in the main area head north and you'll find the Last knight. Now head back down and across the log. Keep going right until you hit the big 5 way intersection. Go up and back left and you'll see another log across the river (In hard mode you need to press the switch for it to be here). Cross it and head up. You'll see a chest that is actually a mimic. Kill it for a STYLISH RIBBON. Then head left into a new area.

Assuming you have all the Insignia's you need, you'll be aloud to pass by the guards here. There's a save point here, use it and head to the next screen for a cut scene. What happens here differs vastly on what path you took to Dillon, but in all cases you'll be done here.

World Map
---------
Head back to Dillon, you should know where it is by now.

Dillon
------
Stock up on anything you might need, because we're heading to the showdown you've been expecting for three acts now. When ready head to the north end of town and enter Dillon Castle.

Dillon Castle
-------------
One of the most annoying areas of the game, its filled with Dillon Guards patrolling everywhere. If they see you, you will have to fight them and then you will be sent back to the beginning of the castle. Just remember that besides that, getting caught isn't a big deal. Guards can only see straight in front of them, but they see infinitely in that direction. Anyway, on with the castle.

Stop! Don't move another step forward, there's a guard who is walking back and forth across the very entrance here. Take advantage of his acute glaucoma and head left right by him then up and right around him. Head to the door on the right. In the next room there is one guard standing against the wall. He will stare towards the right most of the time, and every once and awhile he will look down. Use this moment to run by him undetected. At the end of the hall there's a stairwell and a door. First head into the door. Here you are safe to attack the guard, so do that for the DILLON MASTER KEY. Once that's done, if you took any path to Dillon but the mountain, head to the end of the dungeon for a scene that will net you 70GP, or 50GP in hard mode.

If you took the Arcadia path you can skip the whole part about getting the chest in the garden and go straight to the third floor if you want, saving some frustration.

Head back out of the dungeon and head up the stairs. You'll be above a small garden, enter the doors above you, and then immediately keep going straight up to the next area. If you stand there for too long the guard might see you. Here you'll be outside the castle, head left and back down into the next room. There's no guard here, just a switch. Press it to spawn a chest in the garden we'll get in a bit. Head down and you'll be back above the garden and see the chest. From here your going to want to take the stairs down to what is pretty much suicide. In the next hall there are 3 guards, all with random movement. There's a chest here with 75GP in it if you can grab it. The best strategy is to hope the top guard goes down and then hug the wall around to the chest. Its really all luck because of the random movement. Also its much harder approaching from the south, so I wouldn't try. If you manage to get it great, continue south out of the room. If you get caught no big deal, since you'll end up right outside where you were going anyway. Also worth noting you can't skip this room by going back the way you came, because eventually you'll hit a point where you enter a room standing in front of a guard and you'll get caught anyway.

So, after getting the chest or not, back in the entrance room head to the north exit. The next room is a small hall with no guards that leads to the garden. Use the key you got to open the chest for a SHIV. No, its not as bad as it sounds, this is a special plot related shiv. Trust me. Head back to the entrance and east and back up the right path above the garden. Then time head down into a new room. You'll see a guard by a door moving back and forth always looking north. Head through the door when he moves and you'll find a bucket of healing water. leave the way you came and quickly head left before the guard walks into you. You'll see a similar guard by another door, use the same method to enter this one and there will be a save here. Clime the stairs here and enter the next room.

Here you will need to do one of two things. If you got the shiv, you can approach the guard here and kill him with it. If you took the Arcadia path you can walk over the rubble in the corner and use it to distract the guard. Either way, from here you should head into the big door in the center and into the throne room. From here on out what happens differs greatly depending on what path you took, until you come to the long awaited fight with Duke Greene.

Boss: Duke Greene
This can be a moderately difficult fight, depending on who's with you during the fight and how nasty Greene decides to be. If you have red crescent, that will take a big chunk of his HP off and make the fight much easier. He's got some self heals and he can poison you, so watch out for that. He has two self proclaimed 'special spells'. The first is Falwell, which is just your basic hit all attack, it'll get stronger every time he focuses power. His second spell is Norne Collapse. If he uses this he will start off by 'looking upward' for three turns. At this point he will cast the spell, which will fully heal him and and put you under a 10 turn time limit to beat him before your entire party disintegrates. If this happens just do your best to work around it. It probably shouldn't take more than 10 turns to kill him, so unless your party is already in alot of trouble it should be manageable. When he dies he'll drop BLENHEIM.

Once you've defeated Duke Greene, a bunch more stuff will happen that again can vastly differ depending on the path you took. Eventually you'll head back to Burlington to celebrate your victory amongst other things.
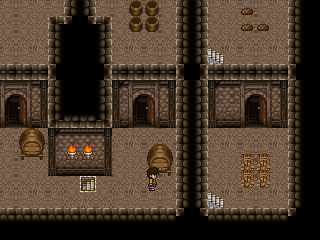
User avatar
loof123
PhysicMage of Arkadya
 
Posts: 5803
Joined: Tue Sep 22, 2009 7:55 pm

Re: Three The Hard Way

Postby jyarceus1993 » Thu Aug 12, 2010 6:23 am

You follow some serious work ethics,don't you Loof? +::O_o +::O_o +::O_o
Spoiler: show
Image

Image
Spoiler: show
Image

La shai'a waqi'on motlaq bal kollon momken-Altair
User avatar
jyarceus1993
DreamLord of Myst
 
Posts: 14471
Joined: Wed Apr 28, 2010 3:03 pm
Location: Chennai,India

Re: Three The Hard Way

Postby loof123 » Thu Aug 12, 2010 7:41 am

Well I'm trying to help. And I'm making saves for this. Been doing stat leveling up. Here are my codes till now:

Code: Select all
Save01.lsd-Just when entering Branchville,on world map.
-I entered Branchville before so your money won't get stolen
-I bugged the man in Somerset so he gave me 5 GP.
-I gave charge-up skill to Vance.
-Vance's stats are (without equipments) :
Attack 9
Defense 9
Mental 9
Agility 15
HP 21
MP 2

Save02.lsd-After doing the first bounty hunter jobi in Lauren's Room
-The stats are the same as above.The only difference is I bought a Leather Cap,
A Bokken and A wine.


Save03.lsd-After doing the 2nd bounty hunter job, in Lauren's room.
-Bought the Leather Armor

-Clifton's stats before leaving the well:
Attack 12
Defense 11
Mental 10
Agility 16
HP 26
MP 11

-Vance's Stats are:
Attack 11
Defense 9
Mental 10
Agility 18
HP 27
MP 8

Save04.lsd-After doing the 3rd bounty hunter job,in Lauren's room.
-Didn't buy anything.

Raynham's stats before entering Elloree:

Attack 22
Defense 24
Mental 6
Agility 10
HP 34
MP 0

McDonald's stats before entering Elloree:

Attack 8
Defense 7
Mental 25
Agility 10
HP 22
MP 22

Vance's stats are:

Attack 12
Defense 11
Mental 11
Agility 18
HP 27
MP 12


User avatar
loof123
PhysicMage of Arkadya
 
Posts: 5803
Joined: Tue Sep 22, 2009 7:55 pm

Re: Three The Hard Way

Postby titaness » Fri Aug 13, 2010 3:31 pm

This looks interesting, but I have never been able to read this font......it hurts my eyes!!! Is there
anyway to change the font??
Image Image
I must cherish every moment, for it soon will rush away
And be lost to me forever, as a part of yesterday
User avatar
titaness
PhysicMage of Arkadya
 
Posts: 2337
Joined: Sat Jul 11, 2009 5:04 pm
Location: Atlanta, USA

Re: Three The Hard Way

Postby loof123 » Fri Aug 13, 2010 3:59 pm

I'm sorry Oracle I don't think so. But most RPG2K games uses this font.
User avatar
loof123
PhysicMage of Arkadya
 
Posts: 5803
Joined: Tue Sep 22, 2009 7:55 pm

Re: Three The Hard Way

Postby chrome » Sat Aug 14, 2010 3:25 am

Wow! You sure did a great work to make a post this long.
chrome
PhysicMage of Arkadya
 
Posts: 4275
Joined: Mon Apr 19, 2010 4:16 am

Re: Three The Hard Way

Postby loof123 » Sat Aug 14, 2010 11:27 am

Here are my ACT I saves:
Save notes:

Code: Select all
I followed the walkthrough

Save01.lsd-Just when entering Branchville,on world map.
-I entered Branchville before so your money won't get stolen
-I bugged the man in Somerset so he gave me 5 GP.
-I gave charge-up skill to Vance.
-Vance's stats are (without equipments) :
Attack 9
Defense 9
Mental 9
Agility 15
HP 21
MP 2

Save02.lsd-After doing the first bounty hunter jobi in Lauren's Room
-The stats are the same as above.The only difference is I bought a Leather Cap,
A Bokken and A wine.


Save03.lsd-After doing the 2nd bounty hunter job, in Lauren's room.
-Bought the Leather Armor

-Clifton's stats before leaving the well:
Attack 12
Defense 11
Mental 10
Agility 16
HP 26
MP 11

-Vance's Stats are:
Attack 11
Defense 9
Mental 10
Agility 18
HP 27
MP 8

Save04.lsd-After doing the 3rd bounty hunter job,in Lauren's room.
-Didn't buy anything.

Raynham's stats before entering Elloree:

Attack 22
Defense 24
Mental 6
Agility 10
HP 34
MP 0

McDonald's stats before entering Elloree:

Attack 8
Defense 7
Mental 25
Agility 10
HP 22
MP 22

Vance's stats are:

Attack 12
Defense 11
Mental 11
Agility 18
HP 27
MP 12

Save05.lsd-Just before entering Cumberland
-Took the revive from the farm
-Cleared out Selma Castle
-2 Rune Tablet Fragments
-Vance's Stats are:

Attack 12
Defense 11
Mental 11
Agility 18
HP 27
MP 12

North's Stats are:

Attack 16
Defense 16
Mental 15
Agility 16
HP 28
MP 8

Save06.lsd-Ready to get the 4th job,Lauren's room.
-Not much changes from previous save,the only thing is I converted those lots of
hardened slimes to tonics and antidotes.

-Vance's Stats are:

Attack 12
Defense 12
Mental 13
Agility 19
HP 29
MP 14

North's Stats are:

Attack 17
Defense 16
Mental 15
Agility 16
HP 30
MP 8

Save07.lsd-After 4th bounty job,Lauren's room.
-Not much to mention. There is only one thing:
-Found the panties in the home and got 50GP instead of 25 GP.Stats are the same.

Save08.lsd-After 5th bounty job,wedding ring guy's home,ready to give the wool.
-There is nothing to mention.

Vance's Stats are:

Attack 12
Defense 12
Mental 13
Agility 19
HP 29
MP 14

North's Stats are:

Attack 18
Defense 16
Mental 15
Agility 16
HP 30
MP 8

Save09.lsd-After the war,wedding ring guy's home.
There's nothing to mention,except the stats:

Vance's stats are:

Attack 12
Defense 12
Mental 17
Agility 22
HP 35
MP 20

North's stats are:

Attack 19
Defense 18
Mental 16
Agility 16
HP 38
MP 8

Save10.lsd-Just before entering Burlington
-3 Rune Tablet Fragments
-Bought Short Sword,Bone Helmet,Silk Gi,Headband

Vance's Stats are:

Attack 12
Defense 13
Mental 17
Agility 24
HP 35
MP 20

North's Stats are:

Attack 20
Defense 18
Mental 16
Agility 17
HP 38
MP 8

Save11.lsd-Just arrived in Marion's Island.
-4 Rune Tablet Fragments
-Not much stat changes...
-Has the Lucky Sword

Save12.lsd-Beginning of Act II,Edisto Inn.
-Got the Marion's Staff.
-Vance's Stats are:

Attack 12
Defense 14
Mental 17
Agility 24
HP 35
MP 20

Fayette's stats are:

Attack 12
Defense 15
Mental 22
Agility 14
HP 30
MP 20


Link:
http://www.mediafire.com/file/88ilapdpb5obo3i/TTHW%20Act%20I%20Saves.rar
User avatar
loof123
PhysicMage of Arkadya
 
Posts: 5803
Joined: Tue Sep 22, 2009 7:55 pm

Re: Three The Hard Way

Postby loof123 » Fri Aug 20, 2010 10:16 am

Just finished this game!!!!! If you finished this game too,which Kaibutsu Lords you have fought??? I fought:
1.Catawba the Perverse Ideologue
2.Manteo the Trickster
3.Orrum The Ravager
4.Ramseur the Stratifier
User avatar
loof123
PhysicMage of Arkadya
 
Posts: 5803
Joined: Tue Sep 22, 2009 7:55 pm

Re: Three The Hard Way

Postby Tomas » Fri Aug 20, 2010 11:01 am

I played Three The Hard Way something like six years ago (so sry loof, can't answer your question, don't remember which Kaibutsu Lord have I fought). It was pretty decent game, fairly long, good story and very hard puzzles (I often spent literally hours trying to solve some riddle or finding the damn switch). Also, Vance is not the typical "help anyone who needs it (and for free)" hero, he's more selfish and sarcastic, with the "if there's nothing for me in it, I won't bother" attitude, and that makes the game more funny.

Except from LP trilogy it was probably the best free RPG Maker game I have ever played, definitively worth trying.
User avatar
Tomas
Ranger
 
Posts: 1747
Joined: Sun Apr 05, 2009 8:41 pm
Location: Czech Republic

Re: Three The Hard Way

Postby loof123 » Fri Aug 20, 2010 11:17 am

that "help anyone who needs it (and for free)" hero type fits North. I don't care at all. Coz I finished yesterday.
User avatar
loof123
PhysicMage of Arkadya
 
Posts: 5803
Joined: Tue Sep 22, 2009 7:55 pm

Next

Return to Your Homemade Games

Who is online

Users browsing this forum: No registered users and 44 guests


Laxius Force III Little Hearts Night of the Stars Fortress of Hell Witch Hunt Millennium 5